Wednesday, September 11, 2019

"Royal Raspberry Cake"


As those who know me can attest, my style of cooking has always been pretty freeform, with approximate measures--even when baking--more common than carefully measured out ingredients.

Having this blog has been a good challenge for me, because I try never to post anything that I have not carefully measured and tried at least a couple of times, so that anyone reading the recipe should be able to easily duplicate it.

Along with testing, I try very hard to be sure that whatever I post is "original," in that I have either developed it from the beginning or have put plenty of spin on some recipe I might have found from another source.

Oh, and finally, I really do try to be sure the recipes are generally "frugal," using seasonal and reasonably priced ingredients as much as possible.

So today a recipe that barely fits these criteria.

First of all, of course, is the frugality of a recipe using four cups--FOUR CUPS!--of almost always very expensive raspberries when purchased at the store. However, if you happen to live in an area like my home where raspberries grow wherever you give them space, the only "cost" this time of year can be the time needed to get out into the berry patch and avoid scratches and bugs.

This cake has definitely been tested and tried, with the first taster saying it was "yummy; almost like ice cream, just not cold." All thumbs up and anxious for more.

The one place where I am testing my own standards is in the originality piece. I was looking for a recipe that would use the quart of raspberries I was able to pick from half the patch (rain kept me from the rest) and came upon this Taste of Home option. Looking it over, I realized it was almost exactly like what I was seeking, so I am posting it with almost no changes. If you want to see the original, go to

Sometimes, things just can't be improved upon, so here is my almost-the-same take on what really is a "royal" cake.

Royal Raspberry Cake

Ingredients

CAKE

 2  cups  flour
1 tablespoon baking powder
1/3 cup butter or margarine, softened
1 cup sugar
1 egg
1/2 teaspoon vanilla
1/2 teaspoon almond extract
1 cup water (OR use skim milk and omit the dry milk powder)
1/3 cup dry milk
4 cups fresh raspberries--if washed, drain thoroughly


GLAZE

1-1/2 cups confectioners' sugar
approximately 2 tablespoons skim milk--enough to make a thin glaze
2 tablespoons butter, melted
1/2 teaspoon almond extract

Directions

  1. ·  Cream butter and sugar until light and fluffy. Beat in egg, almond, and vanilla. Sift together the flour and baking powder and add alternately with milk, beating well after each addition. 
  2.  Spread into a greased 13x9-in. baking dish. Spoon berries over top.


  3. ·Bake at 350° for 30-35 minutes or until center of cake springs back when lightly touched. 
  4.  While the cake is baking, combine all the glaze ingredients. As soon as the cake comes out of the oven, spread the glaze over the cake, leaving berries exposed. Serve warm or cold. 
  5. Refrigerate if not eaten right away, as the cake is very moist. 

 
(Sorry--couldn't get a picture fast enough, before the first pieces were already out of the pan and being eaten!)


-->

Sunday, August 11, 2019

Peach Kuchen


Growing up, I was exposed to very little "German" food, with sauerkraut probably the only that fit that description. So when I married into a family that had maintained their German traditions and recipes, I began to learn about things like "tortes" and "kuchens"--and even bratwurst which at that time were not widely known or available.

Whenever there was a family gathering (and there were many), all the good cooks would bring their rich desserts to share. While many were more Midwestern America cakes and pies, there were also, especially in summer, a wide variety of kuchens for us to share.

And oh, those kuchens! From rhubarb in early spring on through all the berries of summer and then apples as colder weather approached, there were always kuchens. They didn't require rolling out pastry for pies even though they generally had crusts that were very similar. They were usually made in 9 X 13 pans, so each one served many more than a pie. And the fruits were bright and beautiful in any dessert array.

I had not really thought of kuchens for many years, but this year's bounty of peaches and the need to take a dessert to a weekend potluck inspired me to pull out my old recipe card file. There I found a handful of recipes that I could use as a base for the peach kuchen that became my potluck contribution. 

Peach Kuchen

Crust
½ cup soft butter
1/4 cup sugar
1 1/4 cup flour
1 egg 

3 cups peaches, about 1 pound 

Custard:
3 eggs
1 c sugar
2 T flour
¾ c milk
¼ t nutmeg

1.  Crust:  Combine the butter, sugar, and flour until well mixed and then add the egg, forming a crumbly mixture. Press into a well oiled 9 X 13 pan and set aside.

2.  Mix all the custard ingredients together, beating until completely combined. 

3.  Slice the peaches and arrange evenly over the top of the crust. Pour the custard over the fruit, making sure all peices are covered.

4.  Bake at 400 degrees for 10 minutes and then reduce heat to 350 and bake an additional 25 to 35 minutes. Test for doneness by inserting a knife into the custard; if it "comes out clean" (i.e., the knife blade won't have any custard clinging to it), it will be done.


Also may use fresh nectarines, raspberries, strawberries, apricots or other fruits.


-->

Sunday, July 7, 2019

Nectarine Quinoa Salad


This is the season when some of my favorite fruits--peaches, nectarines, and plums--begin to appear in the stores, and this year there have been some wonderful deals--signs of a good harvest? Whatever the reason, I am taking advantage and finding all kinds of good ways to use these.

Now is the time for slicing them on cereal, for making fresh sorbet, for pies and crisps and all manner of desserts. And yes, even, as with today's recipe, including them in salads. 

This is a main dish salad that includes lots of protein as well as all the vitamins, minerals, and fiber that these brightly colored vegetables and the nectarines add.  Some good bread on the side, and you have the makings of a healthy and beautiful meal. 

As with just about any salad, this is a recipe that should be considered as only a start. Note the italicized suggestions that provide suggestions if you don't happen to have all the original ingredients in the refrigerator. 

The dressing recipe makes a good amount, and you'll be glad to have the leftovers for another time. The addition of orange juice to the honey mustard combination adds a special flavor that works well with any tossed salad combination.  here  you will likely have leftover dressing with the amounts included in this recipe. It will keep in the refrigerator for up to a week or more so it will be nice to have it ready for another meal.

Nectarine Quinoa Salad 

1 cup quinoa, red or white
2 cups water
2 teaspoons seasoning powder or 2 bouillon cubes--either chicken or vegetable flavor
1/3 cup sweet onion, finely chopped
1/2 cup diced celery (or sliced radishes)
1/2 cup diced cucumber 
1 tablespoon minced fresh basil (or ½ to 1 teaspoon dried)
app 2 cups baby spinach, coarsely torn (or romaine, shredded red cabbage, and/or kale)
2 nectarines, coarsely diced
1/4 cup sliced almonds
salt and pepper to taste


1.  Prepare the quinoa according to package instructions, adding the seasoning powder or bouillon cubes along with the water. Drain well if all the water has not been absorbed. Cool slightly

2. Tear the greens and put in a large bowl. Add the diced vegetables and basil. Stir in the drained quinoa, nectarines, and almonds. Toss with the dressing, adding a tablespoon or so at a time until desired amount is used. Taste and adjust seasonings as needed.


NOTE: To prepare ahead: Combine the cooled quinoa with all except the nectarines, almonds, and spinach. Chill until ready to serve. Stir in the nectarines and spinach and toss with dressing. Sprinkle almonds over the top.

Orange Honey Mustard Dressing

2 tablespoons honey
2 teaspoons brown mustard
orange juice--see directions below for amount
1 clove garlic--if fresh is not available, jarred garlic may be used
1/4 teaspoon salt or to taste
1 teaspoon black pepper
olive oil--see directions below for amount 


1.  Pour the honey and mustard into a 2 cup measure meant for liquids. Add enough orange juice to bring the mixture to the half cup line. 

2.  Add the garlic and salt and pepper to the cup and then pour in enough olive oil to bring the mixture to the one cup line.

3. Whisk until well combined OR pour the mixture into a jar with a tight cover and shake until completely blended. 

Store any unused dressing in the refrigerator.

Dressing Notes

Use the best quality brown mustard you have but not the kind that is "whole grain;" that will not blend well. In the same way, this is a better place for finely ground black pepper instead of the coarser results you will get from a pepper grinder. 

The orange juice? As you can see in the picture, I keep concentrated orange juice on hand, because I rarely have "regular" orange juice in the refrigerator, and I also don't always have oranges available. For this recipe, add a tablespoon of juice concentrate to the honey and mustard and then fill the measure to the half cup line.

Monday, May 13, 2019

Split Second Cookies, and a Sad Tale about Food Blogs


The recipe at the end of this post is based on an old recipe that was very new to me when I went searching for a "jam-filled cookie" some time ago.

When I found the recipe on one site, it seemed just what I was looking for, and the blog post-er made quite a big deal of having developed this for her recent cookbook (on sale at Amazon and at her site). I was impressed.

As usual, I adapted it a bit and made it for a reception we were holding that evening. When I brought it into the kitchen for putting on trays, the woman coordinating the event said, "Oh, Split Second Cookies. I haven't made those in a long time. They are in the old cookbook I use all the time."

Really? Old cookbook, when this blogger was talking about having "developed" them only two years ago? Hmmmm.

I went back home and started a web search, this time looking specifically for Split Second Cookies. Come to find out, they had won a prize in a 1950s Pillsbury Bake-Off Recipe contest and are justifiably treasured by many as an impressive as well as easy cookie.

The sad thing is reflective of what I see too often among food blogs: the exact recipe--right down to the specific method used--is all too often presented as though it is an original. In fact that first blog where I found this? The author has gone so far as to copyright "her" recipe!

I'm not sure I have yet found the original, original recipe yet, but I did make a few tweaks from what could be the first version. It is way too good a recipe to let it go unknown for others who, like me, might never have come across it before.

Still, I do want it known that this is really not original with me. Just my derivation. So go ahead, try it when you want something light and way fussier looking than it is to make. Then, if you are asked for the recipe, refer back to its decades old derivation. Maybe not your own grandma's recipes but still a heritage too good not to share.

https://bakeatmidnite.com/split-seconds-cookies/#

(This link will bring you to a site with much more professional photos than mine too!)

Split Second Cookies 


3/4 cup softened butter (not melted but very soft for easiest blending!)

2/3 cup powdered sugar

1 egg

1 teaspoon almond extract

 2 cups flour

1/2 teaspoon baking powder
      about 2/3 cup jam--for these pictures, I used my daughter-in-law's homemade cherry jam


1.  Beat the butter and powdered sugar until creamy; a wooden spoon really works best.

2.  Beat in the egg and almond extract.

3.  Sift or stir together the flour and baking powder just until completely blended--don't overbeat.
 

4.  Line 2 cookie sheets with parchment paper--if you don't have any, waxed paper (or even aluminum foil?) could be used. You will want this liner as it will make it easier for the sliced cookies to be lifted out of the pan. 
5.  Divide the dough into four equal portions.  
6.  Place two on each pan, shaping into even logs about 12 inches long. 

 
7.  Using the handle of a wood spoon, make a depression (about 1/2 inch deep) down the entire length of the logs.


8.  Fill with any red jam--a small teaspoon is best for this.


9.  Bake at 375 for about 10 minutes, just until the dough is set and starting to turn a light golden brown.


10.  Remove from oven and leave on the parchment paper for about 5 minutes.


Then, while still very warm, slice on the diagonal. When completely cool, sprinkle lightly with powdered sugar and remove from the sheets. Store in a single layer. Makes about 3 to 4 dozen slices.

Thursday, February 14, 2019

Whole Orange Cake


While oranges are available pretty much year round, this is the season when, at least here in the Midwest, they are most economical, and usually a little more flavorful and sweeter too. It is also the season when the trees we had in our back yard in Arizona would be loaded with both sweetest of the season fruit and those incredibly fragrant orange blossoms.

Ah memories. But back now to snowy Minnesota.

With some really good specials on citrus at the newest grocery store in town, I stocked up on several bags of oranges and decided to try a whole orange cake.

I've seen recipes for these cakes over the years, sometimes identified as "Sicilian," and they have intrigued me, but they also seemed a little bit too messy and bothersome to try. Now, with more oranges than I know I will eat quickly enough, time to check out some of the online recipes and see what I could come up with.

Almost every recipe I found includes a simple glaze made of powdered sugar and orange juice, and while that does enhance the orange flavor even more, I also had some raspberry syrup from last season's berries. So, for the first try at this recipe, I went for the raspberry/orange combination, making the cake with no glaze and the raspberry syrup as a pour over.

Result? Great flavor and a cake that is a lot easier to make than I thought. Of course I say that as one who has two pieces of kitchen equipment that are almost mandatory for making this cake: A good food processor and a stand mixer. While a hand mixer could work too, this needs the butter, sugar, and eggs to be beaten "until light"--which can mean several minutes for best results.

And the second try, with the glaze? Wonderful too, and just a little reminder of those Arizona spring times with the scent of orange blossoms filling the air!


Ingredients
  • 1 cup butter, softened
  • 1 1/4 cups granulated sugar
  • 3 large eggs
  • 1 pound navel or other seedless oranges (about 3 medium)
  • 2 1/2 cups flour
  • 1/4 teaspoon baking soda
  • 2 teaspoons baking powder  

Preparation
1.  Scrub the oranges well and cut off both the navel and stem ends. Then cut them into small pieces, about 1 inch in size. Process by pulsing them until the peelings are well chopped but not until the mixture is pureed. You should end up with between 1 1/2 and 1 3/4 cups. Set aside.


2.  Cream butter and sugar until well blended and then add the eggs, one at a time. Continue beating until the mixture is light colored and very smooth, about 4 to 5 minutes for best mixing. 
  
3.  Add the orange chunks and juice to the creamed butter mixture and beat until well blended.


4.  Either in a sifter or large bowl, stir or sift together the flour, baking soda, and baking powder. Gradually add this to the batter, and beat until well mixed. The mixture will be thick.


5.  Pour the batter into a 9 X 12 pan, spreading evenly. Bake in a 350 degree oven for 35 to 40 minutes.

These photos show the cake made with an orange glaze:

1 c powdered sugar
about 2 tablespoons fresh squeezed orange juice

Mix together; this should be a thin glaze. Pour over the cake as soon as it comes out of the oven. Serve the cake warm or cold.


Alternative Serving:

Skip the glaze and serve serve with a warm raspberry sauce.


Friday, November 16, 2018

Apple Banana Cake


Sometimes, the bananas all seem to ripen (or over-ripen) at once. When a couple of spots develop on those apples in the crisper drawer at the same time, it might just be time for a dessert that uses up both these kinds of fruit.

This cake is super moist and is the kind that really doesn't need any kind of frosting--though ice cream lovers no doubt can be coerced into adding a scoop of vanilla bean on the top, especially if the cake is still warm from the oven.

This goes together quite quickly, except for chopping or grating the apples. As I noted with the Apple Gingerbread I just posted, this is the time to use a small food processor or chopper like the one that came with my immersion blender. But if you don't have any electric appliance like that, it still doesn't take too much time to grate or finely chop the apples, and the results are well worth it.


Apple Banana Cake
Ingredients

1 1/2 c sugar (may use part brown sugar if desired)
1 c mashed banana--about 2 to 3 medium bananas
1/2 t vanilla
1⁄2 c canola oil
2 eggs
2 c flour
2 t baking soda
1/2 t salt
2 t cinnamon
4 c cored and chopped apples (press into cup lightly)

1⁄2 cup of chopped walnuts (optional)


1.  Combine sugar, banana, oil, eggs, and vanilla in mixing bowl and beat together until thoroughly mixed and light in color.
2.  Sift the flour, soda, salt, and cinnamon together (or still together well in a separate bowl from the egg mixture).
3.  Add the flour mixture to the liquid ingredients and stir just until completely mixed. Fold in the apples and nuts and continue until stirring until the apples are evenly distributed throughout the batter.
4.  Pour the batter into a 9 X 13 pan that has not been oiled. Bake at 350 degrees for 35 to 45 minutes until a toothpick inserted in the center comes out clean.

-->

Apple Gingerbread


Novembrrrrr.

This has been a pretty chilly fall here in the upper Midwest, and a winter storm advisory has just been posted for tonight, with perhaps 3 to 5 inches of snow in the forecast....And I still haven't finished clearing the last (I hope) layer of leaves off of my deck.

What better time to fill the house with the warm fragrances of fall. Apples. Cinnamon. And ginger, All it took was the featured price of molasses at Aldi--about half the cost from the other stores in town--for me to begin thinking of homemade gingerbread.

Now my mother's old, old recipe for gingerbread is reliable and great, but I wanted to see if I could add in some of the many apples I have right now. Off to the internet, where I found that most of the recipes for "apple gingerbread" were for upside-down cakes, with a layer of caramelized apples put in the pan, with the gingerbread batter poured over. Not a bad idea, but it wasn't what I had in mind.

I finally found something similar to what I was looking for, so I started experimenting and came up with this version. So far, all those who have tasted it have given it rave reviews, so I hope you will find it equally delicious.

One note:  Probably the longest part of the preparation here is chopping or grating the apples. If you have a small food processor, or a chopping attachment like this one for my immersion blender, use it! This is a time when those little extra kitchen appliances can really be worth having.


Apple Gingerbread
Ingredients
  • 1 egg
  • 1/2 c packed  brown sugar
  • 1/2 c canola oil
  • 2 T frozen apple juice concentrate (see NOTE)
  • 1/2 c molasses
  • 1/3 c water
  • 2 c flour
  • 2 t baking powder
  • 1 t soda
  • 1 T cinnamon
  • 1 T ground ginger
  • 1/2 t salt
  • 2 c coarsely chopped or grated apples--about 1 pound or so; press the apples a little into the cup

Directions
1.  Combine the egg, brown sugar, and oil and beat together until well mixed. Stir in the molasses, apple juice concentrate, and water until fully incorporated. 
2.  Sift or whisk together the dry ingredients and gradually add to the liquid mixture. Stir until completely blended. Fold in the apples.
3.  Pour the batter into a 10 inch round pan or a 7 X 11 pan that has been well oiled or sprayed with cooking spray. 
4.  Bake in a 350 degree pre-heated oven for about 38 to 45 minutes, until a toothpick inserted in the center comes out clean.
5.  Allow to cool about 5 to 10 minutes before turning out of the pan.  Notice the cracks in gingerbread top below; there is nothing to worry about when this happens--really!  


This may be served warm or cold--but the very best way is when it is still warm, with a good dollop of whipped cream on the top!


NOTE:  If you don't have apple juice concentrate, substitute 1/2 cup apple juice or cider for the juice concentrate and water.


-->

Thursday, November 8, 2018

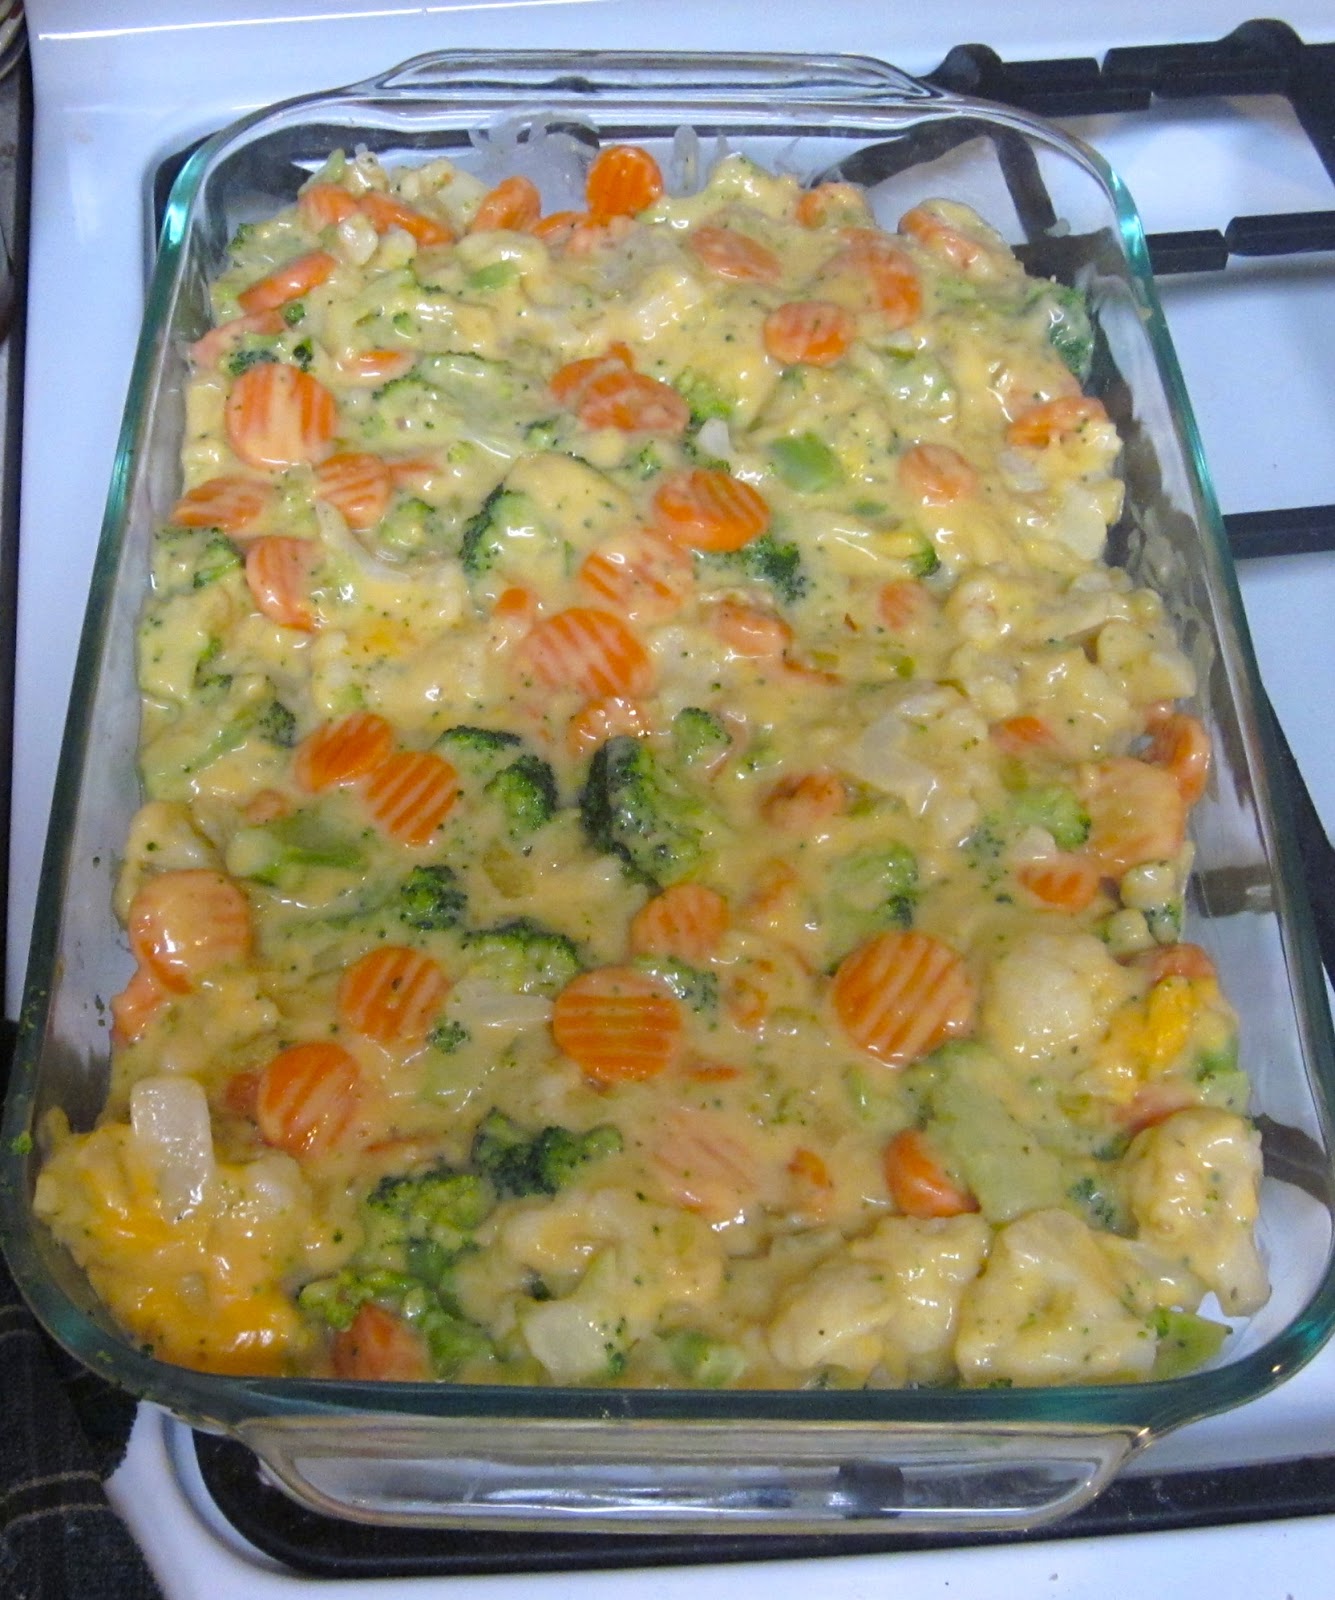
Grandma's California Vegetable Casserole

(The following post is from 2017 but still captures a bit of the story of a very traditional part of our year end holiday meals--all of them!)

This year, work conflicts meant that all of our immediate family couldn't gather on Thanksgiving day for the usual feast, so we would need to celebrate the holiday on two different days. As we began planning for this change, someone suggested that we might split the menu between the two dinners as well as the "guest list."

Thanksgiving dinner in the US is one of the most tradition-bound of all meals, and we all have favorite sides that we expect to include in this November feast. When more than a few people contribute all these "must-have" dishes, the result is far more food than any of us really need at one time. Cutting the number of choices at each of our two dinners was a wonderfully workable way to enjoy our favorites without the usual over-stuffed feeling at the end of the meal.

We have a significant number of vegetarians in our crew, so it was an easy decision to make a vegetarian "turkey" the centerpiece of the first dinner. Then there were unadorned roasted sweet potatoes, Grandma's California Vegetable Hot Dish, fresh cranberry sauce, cranberry apple bread, tossed salad, and, of course, two choices of pie.

For the Thanksgiving Day meal, we had roasted turkey, vegan stuffing, a different cranberry relish, mashed potatoes and gravy (turkey and vegetarian), sweetened sweet potatoes, that traditional green bean casserole topped with fried onion crisps, rolls, and, again, two choices of pie.

Actually, looking at these menus and remembering the meals, these were still very, very full menus, and we were right to make this the only real meal of the entire day each time we celebrated. For us, having the feast in early afternoon means that the pies are held for a few hours and become like a second meal, later in the evening.

All of this description is a lead up to today's recipe, one that works well for all those year-end holiday potlucks, or even as a side if your family has a large Christmas dinner planned. My children's Grandma Laack always included her California Vegetable Hot Dish when we were able to come home for Thanksgiving or Christmas, and it quickly became a traditional side dish for any of our winter holiday meals. When asked the source, she once told me she had just gotten it off the side of some package--probably the Velveeta. Oh, but then she started to think; no, maybe I heard it on WHBL, a local radio station that had a long-running call-in program that featured a lot of recipes over the holidays. Or maybe, she thought, in the Plymouth Review, the local paper with a weekly recipe column, stacks of clipped-out recipes that were in some boxes of Grandma's other "clippings."

The source that I used came directly from a handwritten copy that Grandma had given my daughter-in-law many years ago.


Grandma's California Vegetable Hot Dish

16-20 oz pkg California style vegetables (broccoli/cauliflower/carrots)
1 can cream of mushroom soup diluted with ½ can of milk
8 oz velveeta- cut up
seasoned salad croutons
½ c melted butter [that note just above the ½ c that looks like “2T”—could it be a change Nadia made, or Grandma?]

Mix all ingredients and top with browned croutons. (Can microwave vegetables first). Then bake at 350 degrees until browned.