Monday, June 22, 2015

Cherry Kuchen


This is an old, old recipe from my kids' Great Grandma, passed down and modified to slightly more modern measurements and instructions. "Put in a buttered coffee cake pan?" What size is that? And was a "cup" really a measuring cup, or just the closest coffee cup you could find? I've tested this a few times to be sure that it will work with our modern ingredients and measures, but I think the flavor ends up as comforting and fresh as the original.

This is adaptable to so many summer fruits. While the original called for "1 can sour cherries, drained," fresh or frozen fruit will be even better. As noted below, strawberries, raspberries, probably even blueberries (haven't tried those yet), peaches, nectarines, or some combinations of these can all be used. The amount of sugar might vary too--for very sweet fruits, perhaps only half a cup of sugar needs to be mixed with the fruit in step 1.

I have reduced the levels of fat in the recipe, but, if you want the richer version from the old recipe card, see the variation below. 

Whatever options you choose, this is a recipe that will be a nice variation from pies and crisps.

Cherry Kuchen

Crust
1/3 c butter (if unsalted butter is used, add about 1/4 t salt to this mixture)
1/4 c sugar
1 1/4 c flour
1 egg yolk

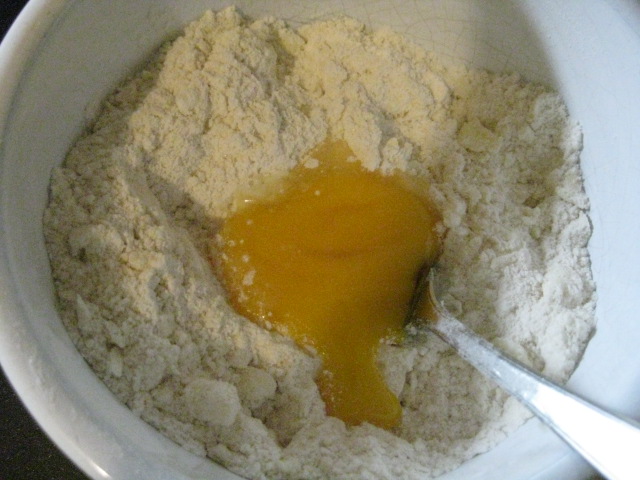
1.  Use a pastry blender* to mix the butter into the sugar and flour. Then stir in the egg yolk just until the mixture is evenly blended.


2.  Using your fingers, press the dough into a well-buttered 9 X 13 pan, working it up along the sides about half an inch or so.

* If you don't have a pastry blender, use two table knives, holding one in each hand, to cut through the butter, pushing the blades against each other.


Fruit Filling
1 pound (about 2 1/2 c) frozen cherries, slightly thawed--I used a mix of sweet and sour cherries from Costco; drain and reserve juices
1/2 c sugar (if using all sour cherries, use 3/4 c)
1/4 c flour

Custard Topping
1 egg + 1 egg white
1/4 c sugar
drained juices from fruit
1 c milk
1/3 c dry milk powder
1/2 t almond extract (optional)

1.  Mix the thawed and drained cherries with the 1/2 c sugar and flour. Spread the cherry mixture over the prepared crust.
2.  Bake at 425 degrees (400 degrees if a glass or thin aluminum pan) for 10 minutes.
3.  Meanwhile, combine all the custard ingredients, beating until smooth.
4.  Remove the cherries and crust from the oven and reduce the oven temperature to 350 degrees.
5.  Pour the custard over the top, and bake at 350 degrees for 25-30 minutes, until the custard is set. (You can test it by inserting a knife in the center. If it comes out clean, the custard is done.)

This can also be baked in two 8 inch pie pans, dividing all amounts evenly. The final baking step may be reduced by 5 or so minutes.


Variation, using fresh fruit

Reduce the flour added to the fruit to only 2 tablespoons. No need to drain the fruit before spreading over the crust and baking. When using fresh cherries, they should be chopped as well as pitted, as they tend to take longer to bake than some fruits.


Variation, using original recipe amounts

Use 1/2 cup butter in the crust.
Omit the almond extract.
Omit the dry milk powder and use half and half or evaporated milk instead of the milk. Actually, the really original recipe used "top milk" here. Farm wives who had their own, un-homogenized, milk, would take the cream from the top of each bottle for baking. Sometimes they might want to save some of that cream for butter or for whipping, so they would use part cream, part milk for their "top milk" recipes.

Other Fruit Possibilities

This recipe works well with strawberries, raspberries, blackberries, blueberries, or a mixture of any of these. Chopped or thinly sliced peaches or apricots may also be substituted.


Monday, June 8, 2015

Southwestern Chicken and Lentils


When I found chicken thighs on sale for less than 60 cents a pound, it was an easy decision to buy a "family pack" of 12 thighs. Braising them all meant that there would be lots of meat in the refrigerator to try out some new chicken options.

Along with plenty of prepared chicken, the pantry also held far more bags of lentils than necessary (story too long to tell here),  so I decided to find a way to use both chicken and lentils in a single main dish. 

My first thought was a curry (lentils always seem to make that an easy decision), but I couldn't quite get excited about that. A little searching for ideas on the internet brought up some Mexican-themed dishes, and I started looking in that direction. Chiles, tomatoes, corn; I had all of those, so why not try to make a dish that used lentils instead of the more typical beans? 

A little of this, a little of that, and I ended up with something that was not really a stew but not your typical Minnesota hot dish either. I served this with the homemade bread I had already baked, but this would probably be even better with warmed or crisped tortillas. Either way, it is a great main dish with lots of flavor and nutrition without a lot of effort.

Southwestern Chicken and Lentils

¾ c brown lentils (the kind most commonly found in grocery stores)
1 ½ c chicken broth
salt to taste (only if the broth is not salted)

chicken fat OR canola oil
1 medium onion, diced
½ red bell pepper, diced
2 carrots, sliced
3 to 4 cloves garlic, to taste, chopped or minced
1 15 oz can fire-roasted tomatoes
4 oz can green chiles
1 to 2 t cumin, to taste
1 t oregano
salt to taste
1 T cider vinegar
3 cooked chicken thighs, cut in large cubes (see method below for precooking, or use a rotisserie chicken if desired)
1 c  cilantro, chopped (see NOTE)
2 c  corn--if using frozen corn, no need to thaw first
2 to 3 c grated cheese--while cheddar or Colby can be used, there are many blends of "Mexican" or "taco" cheese that are especially good here


1.  Combine lentils and chicken broth and bring to a boil. Lower heat and allow lentils to simmer until very soft, about 20 to 25 minutes.

2.  Meanwhile, sauté the onions, bell peppers,  garlic, and carrots using some of the fat reserved from the chicken or canola oil. Cook on medium to medium high heat until the carrots are just beginning to soften. 

3.  Stir in the tomatoes, green chiles, cumin, oregano, and vinegar and return to a slow simmer. Continue cooking for about 10 to 15 minutes.

4.  Stir in the cubed chicken, lentils, cilantro, and corn. Taste and adjust seasonings as needed, and continue cooking for another 10 to 15 minutes.

5.   Just before serving, stir in the cheese or, if you prefer, pour the mixture into the serving bowl and sprinkle the cheese over the top. 

Serves 5 to 6.

NOTE:  
With no fresh cilantro in the house, I used frozen cilantro here, so the color is not as bright as it would otherwise have been. Frozen cilantro does not seem to be as flavorful as fresh, so I actually used a little more than a cup.


Preparing Chicken Thighs for Later Use

canola oil
chicken thighs with bones and skin
poultry seasoning
seasoning salt

1.  Remove most of the skins from the chicken thighs and place in a large skillet, along with a small amount of canola oil. Cook the skins over medium-high heat until they are crisp and brown. Lift the pieces of skin out of the oils, allowing to drain a bit over the pan. Discard.

2.  Place the thighs into the hot oil and sprinkle each piece with poultry seasoning and seasoning salt, to taste. Cook until well browned (about 5 to 7 minutes) and turn. Brown the second side and then add a few teaspoons of water, lower the heat to medium,  and cover the pan. Continue to simmer the chicken until it is tender, to the point of falling off the bone if desired. Remove from heat.

3.  Set the chicken pieces aside to cool. When the chicken is cool enough to handle, cut the meat off the bones and cut into pieces for later use.

4.  Pour off any juices left in the pan and set aside to cool. The fat that rises to the top may be used for sauteeing onions, and other vegetables as in the recipe above. The liquid will be a very concentrated chicken broth that is also a great resource for all kinds of dishes.


This method can be used for as many pounds of chicken as you wish, so consider cooking up a large amount and freeze the boned chicken in recipe-sized portions for later use. The chicken needs to be tightly wrapped (preferably double-wrapped) and used within only a month or two for best quality.

I prefer bone-in chicken thighs to other parts, as the meat is not as dry as chicken breasts, and the thigh bones are much easier to remove than those of drumsticks. Bone-in pieces are usually much lower in cost, and the bones add extra flavor as well.

Triple Berry Pie


Many years ago, I spent a summer working in the kitchen of a local country club. My job was preparing the cold foods. In that time of no pre-prepared ingredients, every day started with peeling and cutting into meticulously sized sticks 5 pounds of carrots, cutting pounds of cream cheese into cubes for garnishing some specialty salad, and washing heaps and heaps of romain lettuce.

Just across the kitchen from me was the large area given to Florence, the woman in charge of the home-baked breads and desserts that were a feature of the club's dining room. From her, I learned much about quantity cooking, and I still have a now tattered napkin on which I wrote some of her recipes that she tried to translate down to family-sized portions.

One of her specialties that appeared on the menu only when blueberries were in season was "Freshy Blueberry Pie." This featured the now standard method of preparing a glaze of part of the berries to pour over the rest of the berries that are simply washed and spread in a prepared shell. What made Florence's pie unique was that she spread a thin layer of cream cheese over the crust before putting in the berries and then the glaze.

For many years, I couldn't afford cream cheese, but I made blueberry (and then peach, strawberry, and raspberry) pies with the glaze and fresh fruit, and these were always favorites of family and friends. This week, I had some cream cheese that I wanted to incorporate into a fruit dessert, but a cheesecake would need more time and calories than I wanted to devote. Then I was reminded of Florence's pies, and I decided to try something new, using blueberries from the freezer, fresh strawberries on special this week, and some raspberry syrup in the refrigerator. The result was beautiful, refreshing, and a great end to a springtime supper with friends.

Note that slightly less than a package of cream cheese can be used. This is a good recipe to consider if you bought some cream cheese for another use and ended up with a partial package that doesn't work for any of those recipes that require the whole package. And you can use whipped cream cheese or the regular block form, whichever you happen to have.

Because not everyone has raspberry syrup on hand (but you really should try it if you have any kind of raspberry crop available to you!),  I have given an alternative glaze following the main recipe. Either way, this is an impressive dessert that showcases the fruit beautifully. It can be a frugal dessert choice too; buy the blueberries in season when on sale and freeze and then make this when the strawberries are at their seasonally low prices too.


Triple Berry Pie

 1 9” baked pie shell

Cream cheese layer
3/4 to 1 c low fat or regular cream cheese, softened (may use whipped cream cheese if desired)
1 T honey
¼ t nutmeg

Filling
2 T sugar
2 T cornstarch
2 T water
1 c raspberry syrup
2 t lemon juice
½ t almond extract
1 c blueberries—if using frozen, thaw slightly
8 oz fresh strawberries, sliced

1. Beat the cream cheese together with the honey and nutmeg until well blended. Spread evenly over the baked pie shell and set aside.

2.  Mix sugar and cornstarch until well blended and then slowly stir in water. Stir vigorously to be sure the mixture is smooth and no lumps remain. 

3.  Place the raspberry syrup in a large microwave-safe bowl (it will boil up, so be sure to use a large enough container). Gradually add the sugar mixture to the raspberry syrup, beating with a wisk or fork to be sure there are no lumps. 

4.  Microwave for 2 to 4 minutes, stirring occasionally, until the mixture boils and becomes translucent. Stir in the lemon juice and almond extract along with the blueberries. Allow to cool slightly.


5.  Meanwhile, slice the strawberries and arrange in a single layer over the top of the cream cheese. Pour the blueberry raspberry syrup mixture over the top, spreading evenly and pressing down slightly to be sure the fruit mixture surrounds the strawberries completely.

6.  Allow to chill at least two hours.


Variation without Raspberry Syrup

Prepare the following mixture and use in place of the raspberry syrup in the main recipe.

1 1/2 c raspberries, fresh or frozen--if using frozen, include all juices
3/4 c sugar
water

Put the raspberries in a measuring cup and add water to fill the spaces so that there is a full 1 1/2 cups of berries and water.

Combine the raspberries, water, and sugar in a large bowl (the mixture will boil up) and microwave for about 3 minutes, until the berries are very soft. You may also cook the mixture on the stovetop, cooking for about 8 to 10 minutes.

Pour the mixture into a colander or sieve to strain out all or most of the seeds. Measure out a cup of the mixture to use in the main recipe.

Double Berry Pie

Substitute strawberries for raspberries in the variation above.