Showing posts with label heritage recipe. Show all posts

Wednesday, December 7, 2016

Applesauce Gingerbread


Now into December, the "pumpkin spice" lattes and bagels (and more) have mostly been replaced in coffee shops and Trader Jo's with wintry peppermint treats. Still, today I was in the mood for the warm and cozy fragrances I remember from my mother's kitchen on gray fall and winter days like the weather we've been having. The day was definitely made for baking something full of spices that would provide that home-baked aroma from my childhood.

Gingerbread seemed to be just the right old-fashioned but quick dessert to go with the day's simple soup and bread supper. There was still a cup or so of applesauce in the refrigerator from last week's baking, so it was time to do some experimenting with ways to blend that in to a soft, rich molasses-y dessert.

After finding pages and pages of applesauce gingerbread options on Google, I knew it was time to try my own version. Out with any butter or oil--the applesauce would easily replace that. 

I also wanted to reduce the molasses levels (probably the most expensive ingredient of the cake) without losing that deep rich flavor. With dark brown sugar well priced at a lot of stores right now--holiday baking specials are at their peak--I could still be assured of a good deep flavor even with less molasses. 

One of the things all the "old-fashioned" gingerbread recipes called for was hot (or even boiling) water. Wondering if this was a step I could skip, I did a little more searching and found the following possible explanations at http://thelunacafe.com/the-sticky-gingerbread-of-my-dreams/ 
 
  • One explanation claims that the baking soda is added to neutralize the acids in the batter, in addition to adding tenderness. This makes sense when you consider that the leavening must be balanced to achieve a neutral pH.
  • Molasses and brown sugar are very acidic, thus the baking soda neutralizes this acidity, allowing the baking powder, which in itself is balanced, to do the actual leavening.
  • When baking soda is added to hot liquid, gas releases that changes the pH of the recipe and darkens the color of the batter (especially when cocoa is part of the batter).
  • Hot water loosens the gluten strands in the flour, creating a lighter textured gingerbread.
  • Warming the eggs prior to baking the gingerbread allows them to expand to their utmost in the oven.
Whatever the reason for it, hot water would stay. Still, I was looking for as streamlined a recipe as possible, so I ended up with the following. Using the microwave to heat the water while mixing up the rest of the batter didn't really add any time to the preparation--and probably even shortened the overall baking time, even if only by a little. 

In the end, this amount filled a 9 X 13 pan (or two 9 inch square or round pans), even though it is almost the same as several recipes that called for putting all the batter into a 9 inch square pan. While the smaller pan would give a very high cake that some might prefer, I would be concerned that the center might not be done until the edges were beginning to dry out, not a result I was looking for. Spreading the batter into the larger space still provided a cake with slices at least 2 inches high.

Served still warm from the oven (or re-warmed for a few seconds in the microwave), this is a fine dessert without any kind of topping. Of course, you could add a plain powdered sugar icing (and some sprinkles to match the season) or, as I remember my father doing, just split a piece and spread a little butter over each piece. After all, Dad would say, it is bread. 

The picture at the top of the page resulted from trying to please both those who like their gingerbread unadorned and those who appreciate a little more elaborate presentation. By alternating the iced and plain pieces, the presentation turned out to be a little more fun. 

To stay closest to the version I grew up with, however, I would need to make some real whipped cream. You can scroll below the recipe for a quick story on the whipped cream topping of my childhood.

Whether you decide to whip up some cream, scoop rich vanilla ice cream on to each warm square, frost it, or just eat it plain, the result will be a warm, rich finish that can turn even the simplest weeknight meal into a very special meal.
 
Applesauce Gingerbread

2 1/2 c flour
1 1/2 t soda
2 t cinnamon
2 t ground ginger
1/4 t nutmeg
1/4 to 1/2 t cloves
1/3 c sugar
2/3 c molasses
1 c applesauce
1 egg
3/4 c  hot water

1. Prepare the pan(s) by oiling well, and preheat the oven to 350 degrees. Use either one 9 X 13 pan or two 9 inch round or square pans. As soon as the batter is mixed, you will want to get the gingerbread into the oven, as the hot water will begin leavening the batter immediately.

2.  Mix wet ingredients (except the hot water) together and set aside. Heat the water in the microwave (or on top of the stove) until almost boiling.

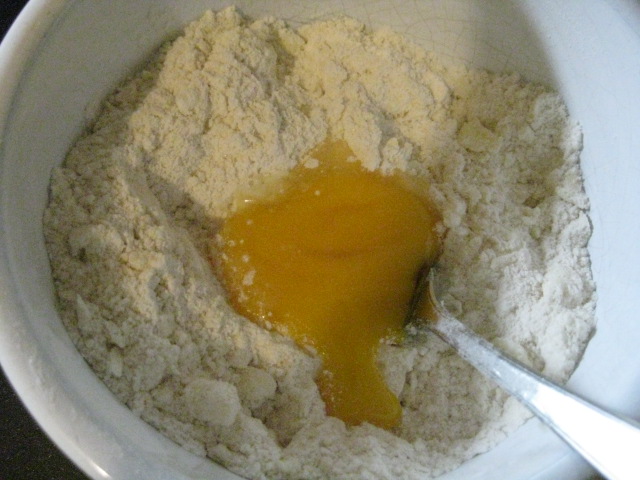
3.  Mix the dry ingredients in a large mixing bowl.  Make a well in the bottom of the dry ingredients and pour in the wet ingredients. Mix just until blended.


4.  Add the hot water and mix again, stirring just until blended. Immediately turn into the prepared pan and put into the oven.


5.  Bake for about 25 to 30 minutes, until a toothpick inserted in the center comes out clean.

6.  If not serving from the pan--the most "authentic" way for a home-y dessert like this--wait about 10 minutes before turning it out on a cooling rack.

 This keeps quite well, though it is moist enough that it will be best stored, tightly covered, in the refrigerator.


 Nostalgic thoughts on gingerbread from my childhood:

For most of my early years, we had a cow or two on our tiny farmstead, so we had plenty of cream-on-top milk. When Mom made gingerbread, she would pull out an old green pitcher that had an egg beater built right into a wooden lid. We then took turns whipping that fresh cream, with just a tiny bit of sugar beaten in, ready for each person to dollop on to their warm gingerbread squares.


The mixer and lid are long gone, but the pitcher remains one of my favorite heirlooms from my mother's kitchen.In the spring, I love filling it with peonies or lilacs. In the summer, though it doesn't pour as easily as other pitchers, it looks great filled with ice-cube-cooled lemonade. 

One thing I have not done with it, though, is use it for whipped cream; that's a delight I have never enjoyed. Maybe, just for old times sake, and to help my grandchildren share a memory with me, I need to find an egg beater that will fit the narrow confines and whip up a mound of creaminess to go on top of another batch of gingerbread. For now, however, they were fully satisfied with just the gingerbread, still warm from the oven. Maybe that will be their memory they carry deep into the 21st century for their own future families.

Tuesday, October 18, 2016

Molasses Popcorn Balls

Sometimes every rule needs an exception.

A basic "rule" for this blog is to never post a recipe that I haven't tested--very recently--at least once, if not more. I have also been trying to include photos on every entry, even if my camera skills are pretty basic.

This entry, however, is going to be an exception. The recipe below is one I haven't made in years and don't plan to try for awhile more, so it's not tested, and won't have photos to show results.

Still, because it's been in the family for a long time, I thought I'd put it out here and hope some of you might try it and add a photo of your efforts in the comments below.

Why now? A Facebook post about popcorn balls made with light corn syrup reminded me of Mom's better, in my opinion, recipe, and a niece responded, asking if I had Mom's recipe. It didn't take long to find the yellowed and battered Molasses Popcorn Balls card, in her own handwriting.


As I recall, the "season" for popcorn balls started around Halloween. If she hadn't made homemade doughnuts to give out for trick or treat, there were likely to be popcorn balls--back in the days when homemade treats were far more common than any wrapped candy from a store.

There were other times when we made these too, usually on a cold winter evening.  Those were the times when we sat together as a family, playing some games or listening to a radio program (we were among the last people I knew to get a television). Dad had a terrific sweet tooth, and so he would often say, I'll crack some nuts if you (Mom and us kids) want to make fudge--or divinity. If we didn't have any more of the hickory nuts we'd gathered in the fall, he might instead bring up some apples from the basement and peel a few, using his pocket knife to make a spiral of peeling we'd grab before it fell on the floor.

And sometimes, to go with those apples, Mom would bring out the popcorn popper and make popcorn balls. After Halloween, these were a rare treat because they are, admitedly, pretty messy to make, but the deep molasses fragrance after the smell of popping corn could warm up even the coldesst, dreariest evening.

With all these memories stirred, and Halloween around the corner, it seems like a good time to pull out this "heritage recipe" and maybe have a family night making these together. For total authenticity, find an old radio program to download and listen to while you are working.

Following is, first, Mom's original recipe, one that does not include any idea of how much popcorn to use, other than knowing that, in the end, you should have 12 balls. Hers were usually the size of a baseball after packing together, if that helps any.

If you look closely, you'll see my own notes and adaptations, dated May/68--so you know the card is OLD! I've included those changes following the transcription of Mom's original below. Finally, there are the comments Mom had also included on the back.

These popcorn balls were often sticky, but they were full of flavor and very much like rich caramel corn--or like old-fashioned Cracker Jack, without the peanuts. We would sometimes butter our fingers or even grab up the sticky popcorn with pieces of waxed paper protecting our hand as we molded them into shape.

A couple of notes:

As noted above, there is no measurement for popcorn anywhere on the card, but, based on the volume of syrup, it probably was a lot. She used a saucepan about the size of those stove-top poppers you see in the stores, and I am going to guess she made at least two batches for this recipe.

I'd suggest popping a lot more corn than you need, put some (8 cups or so?) in a big bowl and begin pouring the syrup over it. If you need to add more corn, you can just toss some in as you stir, until the mixture seems just about "right." And if you end up with too much corn to make the balls stick, then you have caramel corn. If you don't have enough popped corn, well then, you have some very, very sweet, very, very sticky popcorn balls that may need to be eaten with a spoon--or at least have popsicle sticks stuck in the center to keep your fingers relatively unstuck!

Use a bigger pan than you might think you need, and be prepared: when you add the soda, the mixture will bubble up vehemently.

You do need to be careful not to handle the mixture when it is too hot--you can burn yourself pretty easily if you do. At the same time, waiting too long for the mixture to cool makes it almost impossible to get the balls to come together. (Maybe that is why my variation is for caramel corn instead of popcorn balls!)


Molasses Popcorn Balls
1 3/4 c light molasses
2 c sugar
2/3 c water
2 t vinegar

Cook to hard ball stage (250 degrees).
Remove from heat.
Stir in 1/2 t soda - mixing thoroly.
Pour over corn, stirrig up from bottom of dish so all corn is covered. Shape into balls.
Makes 12 balls. 

 good w/variations May/68

My changes to the popcorn balls recipe were somewhat minimal:

1/2 c. light molasses--but I would have used "dark" or regular molasses, since I never had light molasses in the cupboard
3 c sugar
Continue with Mom's original recipe.

OR the caramel corn! 

1/2 c white syrup (this would mean light corn syrup)
3 c brown sugar
1/2 c water
2 t. vinegar
1 T butter
add 1 T salt to this mixture before cooking. 
Cook (with an arrow pointing to the 250 degrees)
Another arrow confirms that 1/2 t soda should be added just with the popcorn bals.

Though my notes on the card don't have much more explanation than Mom's, I remember laying  waxed paper on a cookie sheet and then spreading the caramel corn out on that to dry. 

(I will be frank here: My sister Merry has a much easier and better oven caramel corn recipe that I will probably be trying sometime in the next few weeks. I plan to post that soon, so you can compare and make up your own mind about which is better.)

And the notes on the back

As with many of Mom's recipe cards, there were little notations and extras on the back of the card. This one was no exception. Here is, verbatim, what she had added.


A quickie:
   Melt 1/2 lb light caramel candy with 2 T water - in top of double boileer. Stir until smooth and pour over 2 qts salted popcorn. Spread on buttered cookie sheet. Cool, break apart.


And one more, final, final, note for our family:

If you notice on the card, and on my transcription, Mom's instructions for adding the soda were to stir it in "-mixing thoroly."

Mom was a stickler for correct spelling, but she also spelled a few words in a very unique way, "tho", "thoro", and "thoroly" the main ones I ever noticed. She explained that Grandpa Brereton had been a great believer in the University of Chicago "simplified spelling" movement and had taught her some of these "simplified" words. I just checked and there is a lot of information on this out on the internet, much of it behind paywalls. Still, the Wikipedia article seems pretty accurate, so you might want to check this out:

https://en.wikipedia.org/wiki/Simplified_Spelling_Board#The_first_300_words


Monday, June 22, 2015

Cherry Kuchen


This is an old, old recipe from my kids' Great Grandma, passed down and modified to slightly more modern measurements and instructions. "Put in a buttered coffee cake pan?" What size is that? And was a "cup" really a measuring cup, or just the closest coffee cup you could find? I've tested this a few times to be sure that it will work with our modern ingredients and measures, but I think the flavor ends up as comforting and fresh as the original.

This is adaptable to so many summer fruits. While the original called for "1 can sour cherries, drained," fresh or frozen fruit will be even better. As noted below, strawberries, raspberries, probably even blueberries (haven't tried those yet), peaches, nectarines, or some combinations of these can all be used. The amount of sugar might vary too--for very sweet fruits, perhaps only half a cup of sugar needs to be mixed with the fruit in step 1.

I have reduced the levels of fat in the recipe, but, if you want the richer version from the old recipe card, see the variation below. 

Whatever options you choose, this is a recipe that will be a nice variation from pies and crisps.

Cherry Kuchen

Crust
1/3 c butter (if unsalted butter is used, add about 1/4 t salt to this mixture)
1/4 c sugar
1 1/4 c flour
1 egg yolk

1.  Use a pastry blender* to mix the butter into the sugar and flour. Then stir in the egg yolk just until the mixture is evenly blended.


2.  Using your fingers, press the dough into a well-buttered 9 X 13 pan, working it up along the sides about half an inch or so.

* If you don't have a pastry blender, use two table knives, holding one in each hand, to cut through the butter, pushing the blades against each other.


Fruit Filling
1 pound (about 2 1/2 c) frozen cherries, slightly thawed--I used a mix of sweet and sour cherries from Costco; drain and reserve juices
1/2 c sugar (if using all sour cherries, use 3/4 c)
1/4 c flour

Custard Topping
1 egg + 1 egg white
1/4 c sugar
drained juices from fruit
1 c milk
1/3 c dry milk powder
1/2 t almond extract (optional)

1.  Mix the thawed and drained cherries with the 1/2 c sugar and flour. Spread the cherry mixture over the prepared crust.
2.  Bake at 425 degrees (400 degrees if a glass or thin aluminum pan) for 10 minutes.
3.  Meanwhile, combine all the custard ingredients, beating until smooth.
4.  Remove the cherries and crust from the oven and reduce the oven temperature to 350 degrees.
5.  Pour the custard over the top, and bake at 350 degrees for 25-30 minutes, until the custard is set. (You can test it by inserting a knife in the center. If it comes out clean, the custard is done.)

This can also be baked in two 8 inch pie pans, dividing all amounts evenly. The final baking step may be reduced by 5 or so minutes.


Variation, using fresh fruit

Reduce the flour added to the fruit to only 2 tablespoons. No need to drain the fruit before spreading over the crust and baking. When using fresh cherries, they should be chopped as well as pitted, as they tend to take longer to bake than some fruits.


Variation, using original recipe amounts

Use 1/2 cup butter in the crust.
Omit the almond extract.
Omit the dry milk powder and use half and half or evaporated milk instead of the milk. Actually, the really original recipe used "top milk" here. Farm wives who had their own, un-homogenized, milk, would take the cream from the top of each bottle for baking. Sometimes they might want to save some of that cream for butter or for whipping, so they would use part cream, part milk for their "top milk" recipes.

Other Fruit Possibilities

This recipe works well with strawberries, raspberries, blackberries, blueberries, or a mixture of any of these. Chopped or thinly sliced peaches or apricots may also be substituted.


Wednesday, April 3, 2013

Using Up those Hard-Cooked Eggs

First there were just boiled eggs dipped in salt and pepper. Then perhaps came the egg salad sandwiches, then the deviled eggs. Now, every time you open the refrigerator, you are still faced with three, four, or even more colored creations staring you in the face. Will the family really accept another night of eggy eating?

Probably the best way to use up the last of the Easter eggs (and to add the cheap protein of eggs into meals the rest of the year) is to think salad.

Not just egg salad though. Instead, start to consider some of your usual tossed salads and add in some  hard-cooked eggs for garnishing, for texture, and for flavor. Check the refrigerator for the ingredients you have to make a basic salad. Today I have Romaine, tomatoes, a red onion (always onions!), cabbage, green pepper, and an avocado. Not hard to see how tossing these other ingredients together with some egg slices on top could be a great side dish for the rest of the meal.

There are also some classic "composed" salads. As one website says, composed salads aren't tossed, they are "placed. You could try a Salad Nicoise that starts with an array of tuna, tiny green beans, potatoes, and egg slices, with lots of other additions possible for the creative or adventurous cook.  

However, if those egg slices looking up at everyone are just too much a reminder of how often these Easter eggs have been showing up, try chopping them into your favorite potato salad recipe. Serve it as a side with some slices of that leftover ham and apple and cranberry sauce and you'll have a bright meal with the eggs relatively hidden from view.

If you have a creamy dressing--bottled Ranch or Caesar for example--you could also put crumbled egg yolks (and finely chopped whites) into the dressing for either a lettuce or coleslaw salad too.

Two tools that I have in my kitchen have proven invaluable in cutting nice slices or chopping hard cooked eggs: an egg slicer and a pastry blender. Neither is essential, but I acquired them long ago and they are especially useful at times like this. If you don't have one or the other of these tools, a standard fork works just fine for chopping too.


In doing some research for this post, I found a couple of recipes that included finely chopped eggs in meatballs, but I haven't tried this. If you have, please let me know how it worked out.

A Heritage Recipe for Today

Finally, hard cooked eggs bring back to mind a "Depression recipe"  Mom often served when finances were a little tight. She had carried this salad forward from the 30s, when selling eggs and chickens helped them keep the family farm, usually served with just some homemade bread and perhaps some applesauce or (for my father's ever-present sweet tooth) some homemade cookies for dessert.

I have lightened the recipe by substituting a yogurt dressing for the Miracle Whip that she used for all manner of creamy salads, but the rest of the ingredient amounts remain as close to hers as I can recall. It is actually a very healthy vegetarian main dish and there are a lot of textures in play here. Still good with homemade bread or crisp crackers, and a fruit tray would make a great completion to the meal...pretty inexpensive as well, so you might want to try this one out with those few remaining eggs. Just leave the sliced egg garnish off if you think the family has seen altogether too much of these lately!


Kidney Bean and Egg Salad
2 hard-cooked eggs, coarsely chopped
1/2 to 3/4 c diced celery, to taste
1/4 to 1/3 c minced sweet onion, to taste
3/4 c (1/2 15 oz can) dark red kidney beans, drained (see NOTE)
salt and freshly ground black pepper, to taste 
1 more hard-cooked egg, sliced, for garnish (optional)

Dressing
1/3 c plain, nonfat yogurt
1 t mustard--yellow prepared or your favorite flavor
1-2 t sugar, to taste

1.  Combine dressing ingredients.
2.  Toss the salad ingredients together and add just enough dressing to coat the mixture.
3.  Add salt and pepper to taste.  

Suggested serving:  garnished with sliced hard-cooked eggs and parsley, on lettuce leaves if desired. Black olives are also a very good addition to this salad, adding even more color.

NOTE:  For whatever reason, canned kidney beans invariably have sugar added--unlike just about any other kind of bean other than "pork and bean" styles. If you want to use home-cooked kidney beans, you may find a bit of sugar stirred in with the salad ingredients will give you a more "traditional" flavor.


.