Saturday, May 21, 2011

Rhubarb Again, for a Spring Day

The fragrance of the lilacs in the vase on top of the refrigerator, the cinnamon-y smells from the oven, the thrill of actually having a little asparagus from the garden big enough to harvest-spring is again giving us a sensory overload, even in the house.

Not enough asparagus yet for any real recipe, but I can cut it, still uncooked, into a wonderful fresh tossed salad. (I still prefer raw asparagus anyway!)

On the other hand, the rhubarb is sprawling across its patch in the lawn. Mine is not as red as some varieties, but it still works fine for spring desserts--for other people, since I'm still not a fan.

I am baking for a friend who can eat very little dairy and has to stay away from fructose, so honey and even some fruits have to be avoided. Plain old sugar works fine, however, as do berries and rhubarb, so a rhubarb crisp will be fine.

Today's recipe uses a method I hadn't tried before, preparing a cornstarch thickened sauce to spread over the fruit before baking, a little extra step that has given a juicy but not too runny filling.


Fructose-free Rhubarb Crisp

4 c diced rhubarb
1 to 2 c diced strawberries

3/4 to 1 c sugar, depending on the sweetness you desire
2 T cornstarch
1 c water
1 t vanilla

Topping:
1/2 c packed brown sugar
1/2 c flour
2 T oil plus 2 T butter OR 1/4 c margarine
1 1/2 t cinnamon
3/4 c rolled oats

1. Mix the fruits and spread in a 7 X 11 (OR 9 inch square) baking dish.

2. Stir the sugar and the cornstarch together in a small saucepan until evenly mixed. Stir in the water. Cook over medium to high heat until translucent and bubbly, stirring frequently. Remove from heat and stir in the vanilla.

3. Pour the cornstarch mixture over the fruit, mixing well.

4. Stir all the topping ingredients except the rolled oats until evenly mixed. Blend in the oatmeal and spread the topping evenly over the fruit.

5. Bake at 375 degrees for 35 minutes, until the fruit is tender and the crisp is bubbly and golden.

Cilantro, Veggies, and Beans--the Perfect Vegetarian Combo


If you are one of those people who find cilantro an herb to be avoided at all costs, you will probably want to move along. However, for the rest of us, this will be a refreshing spring vegetarian feast.

With lovely big bunches of cilantro on sale at a local chain, 3 for 99 cents, it was time to indulge. All colors of bell peppers were also on sale, and I had dried garbanzos already cooked and in the refrigerator, waiting for inspiration. The result was this colorful, quick, and inexpensive vegetarian main dish. As a nice plus, it also served as a vehicle for a few other leftovers--hence the small amounts of cabbage, frozen peas, and broth. Make your own variations with your own leftovers and enjoy.


Cilantro Chickpeas

1 to 2 t canola oil OR chicken fat (I had some at the top of the refrigerated broth so used that for a little more flavor)
1 c sliced carrots (2 small)
1/2 c chopped onion (1/2 medium)
3/4 c coarsely diced green bell pepper
3/4 c coarsely diced red bell pepper
1/2 c shredded cabbage
1/2 c frozen peas
2 cloves garlic, minced
1 c chicken broth (convert this to a vegetarian/vegan dish with vegetable broth)
1 c chopped cilantro--leaves and stems
1/2 t Cajun seasoning (or red pepper flakes or cayenne pepper to taste)
seasoning salt to taste
2 c garbanzo beans, with liquid

Optional toppings:
Shredded mozzarella cheese
Coarsely chopped cilantro leaves
Salsa
Plain yogurt or sour cream

1. Saute the carrots and onion in the fat for about 5 minutes, until the onions are just beginning to turn translucent.

2. Add the peppers, cabbage, and garlic, and simmer at medium heat another 5 to 10 minutes, until the peppers are just barely tender.

3. Stir in the cilantro, beans, and seasonings, and cook just until the mixture returns to a good boil. Stir in the frozen peas, remove from heat, and serve as is or with optional toppings as desired. Serves three to four.

**********************************

As given in the recipe, this will be a little "soupy," perfect for serving in bowls like a thick stew. If you'd rather have it a little thicker, use less of the bean liquid or let the juices simmer down a little (not too long--this is best with the veggies just barely done). This could be served with rice, good crusty rolls, or warmed tortillas. Add a tossed salad and perhaps some fresh fruit of the season for a really fast, really healthy meal...and for a very reasonable cost as well.

Frugal note: The total cost of this dish, due to the sales this week and the use of home-cooked beans, was less than $1.50. If peppers are not on sale, you could substitute Trader Joe's frozen pepper strips (just add a few minutes after the cabbage) and still have a main dish well below $2.00. The cheese will add more to the cost, but using a dollop of yogurt (or just glasses of milk) to add the complementary amino acids will mean a lot of nutrition for not a lot of cost. (The broth was virtually free, since I just saved the juices from some chicken breasts that I had sauteed for another dish earlier in the week.)

Fast note: With the beans already cooked, the prep time for this includes washing the carrots and peppers and doing the chopping, not at all the big production that it may seem. (For more information on cooking dried beans, scroll down to my September 2010 post on this topic.)

Dump all the vegetables to be washed in some water, scrub well, and drain. (If you are tossing a salad and/or preparing some fresh fruit, wash it all at once--and no need to wash the onion; you'll just have a mess trying to get the peelings off!)

Then use one cutting board and one knife and just chop one thing after another. No need for washing the board or knife in between.* As for measuring, you can just guestimate and chop about the amount of each that looks like what you'd like. If you do want to measure, use the same cup, with no need to rinse between. At the end of the process, here is the stack of what you will have to clean up:


*Some notes on cutting boards

I keep one cutting board just for onions, peppers, and garlic, even some herbs and some of the fresh veggies from the garden--it's the one in this photo. According to my mother my great grandfather made this for my great grandmother early in their marriage back in the 19th century. Still going strong after all these years, it's a little hollowed out in the middle, but it's the perfect size and I use it almost every day. To care for it, I usually just swish some plain water over it and let it drain dry. If it needs a little more attention, I wipe it with a soapy cloth and quickly rinse, but that's about it. There is something very comforting to knowing that there is so much heritage in such a simple piece of kitchen equipment, and it holds a place of honor on my counter top.

And yes, I never, ever, let this board be used for meats or anything that might provide unwelcome contamination. For meats or anything that could lead to contamination problems, I use dishwasher safe boards.

This is also not the board for cutting up pineapple, melons, etc., either, not because of the cross-contamination problem. Rather, the old "onion board" is all too likely to impart just a hint of the strong flavors of the things it is used for, so I have another couple of boards of different sizes for these foods.

Do you need a whole set of cutting boards? Of course not. But I strongly recommend having at least two--one like my heritage board for cutting the strong flavored foods you'll be cutting and another that can be washed in the dishwasher or otherwise well-sanitized.

Sunday, May 8, 2011

Bananas, Bananas, Bananas


"Slightly Used Bananas"


The manager of the little IGA store in our community back in the 50s and 60s always marked down overripe bananas with the sign, "slightly used bananas." That silly term stuck in my childish mind and I still find myself using it for the brown speckled fruits like these in the picture.

As you can tell, I find these hard to resist! However, it is hard in 2011 to get this much fresh fruit of any kind for $1.07, the price of this particular pile of bananas. So what else will I do with them? Many will disappear as casual snacks for anyone walking by, along with slices on breakfast cereal. Then there are so many other possibilities--smoothies, topping for cereal at breakfast, baking...but probably not any banana bread. I'm not a big fan of those kinds of breads and don't have any reason to bake them for taking anywhere. No banana bread but here are some other ideas for your next mass purchase of bananas:

Step One:

I made a couple of banana cakes, a lighter version of banana bread and a simple but satisfying dessert from the "archives" of Laack family recipes.

A few changes: I substituted plain yogurt for "sour milk" in the original recipe* and reduced the sugar slightly. In addition, Great Grandma Laack made this with a milk chocolate-y frosting, but I long ago changed the preferred topping to a brown sugar caramel icing that really enhances the banana flavor.

*If you want to go with "sour milk," just put a teaspoon of vinegar in the measuring cup and add milk to the quarter cup line and let the mixture sit for a couple of minutes before adding.


Great Grandma Laack's Banana Cake

3/4 c butter, softened
1 1/4 c sugar
2 eggs
1 t vanilla
1 c mashed bananas
1/4 c plain yogurt
1 3/4 c flour
1 t soda

1. Cream the butter well; add the sugar and continue beating until mixture is very creamy.

2. Beat in the eggs and vanilla. When smooth and creamy, mix in the bananas and sour milk or yogurt. Continue to mix until evenly blended.

3. Sift together the flour and soda and gradually add to the creamed mixture. Continue mixing for about 1 minute with an electric mixer or until the batter is smooth and very evenly mixed.

4. Turn the batter into a well-oiled and floured 9 X 13 pan. Bake at 350 degrees for about 30 to 35 minutes. Cool and frost. Sprinkle with chopped walnuts if desired. (If using a 10 inch disposable pan, as in the photo below, reduce oven temperature to 325 degrees and expect to add 5 minutes or so to the baking time.

Caramel Frosting 

Ingredients
  • 1 1/2 T butter
  • 3 T milk
  • 1/2 c packed brown sugar
  • 1 1/2 c confectioners' sugar
  • 1/2 teaspoon vanilla extract
Directions
  1. In a saucepan over medium heat, melt the butter, and mix in the milk and brown sugar. Boil vigorously for 1 minute.
  2. Remove from heat, and cool slightly. Beat in the vanilla and then gradually add the powdered sugar, beating after each addition. If necessary, add a few drops of milk or water for best spreading consistency. (This spreads most easily when it is still warm)
  3. VARIATION: Substitute strong coffee for half the milk.


Some general banana baking hints:

A cup of mashed bananas is about three medium or two large bananas. If your bananas don't quite make it to one cup, add a little milk (or yogurt if part of the recipe) to bring it up to one cup. If you have just a little more than a cup--say up to even a couple of tablespoons--you can probably proceed with the recipe with no adjustments, or you could add perhaps a tablespoon of extra flour. (FRUGAL alert here--DON'T throw out any extra banana puree if your bananas don't exactly come out to an even cup measure! If you don't want to just have this little bit of healthy snack, pop it into an ice cube tray or a small plastic bag and use it as an "ice cube" for a smoothie.)

Almost all banana breads, cakes and cookies have been developed using very ripe bananas--after all, when do we usually think of these recipes? When the bananas are sitting on the counter turning mushy and brown! If your bananas are on the green side, however, you can use them but will need to be very sure to mash them thoroughly so that they mix in well.

As for mashing--I find it easiest to just use a measuring cup that is larger than the amount called for. I put chunks of the banana into the cup and then use an ordinary table fork to mash the banana down to a smooth mass. No extra dishes and you can quickly tell if you have enough banana for your recipe. And, unless the bananas are still very firm, a fork is just right for the job.

Step 2--The Freezer

Call it banana triage. Those in the best condition will be peeled, cut in half if too large, and then turned into banana-sicles. I just insert a wood craft stick (okay, popsicle stick, but that is a brand name I'm supposed to avoid!) into each and freeze them on a cookie sheet. When solidly frozen, they too will be put into a heavy freezer bag and stored for snacks. If you want to up the ante, you could roll them in chocolate milk powder (like Nestles Quick) or even coat them with a little peanut butter before freezing (or do both? I haven't ever tried that but it sounds like it could work.)


Some of the bananas may have spots but have firmer chunks between the spots. These can be cut into approximately one inch chunks and frozen on a cookie sheet. When these are solidly frozen, put into a freezer bag and have them ready to use in smoothies. Just pop a few chunks into the blender as you would ice cubes.

And finally, the softest bananas and/or those with the most spots get mashed to a puree, and are frozen in one cup portions in individual plastic bags--you can use just the lightest sandwich bags for each of these and just put them all in a larger freezer bag. Most banana breads, cakes, etc., use a cup of bananas at a time, so these pre-measured packs are great convenience foods. Just thaw in the refrigerator--or, if you are like me and think of the bananas at the last minute, thawed on the defrost setting in the microwave.

One more thing--tthis makes about 18 cupcakes. Bake these for aboutt 20 to 25 minutes.

Friday, May 6, 2011

First Rhubarb, Stretched


Rhubarb and lilac and tree buds and all those other harbingers of spring are late here in Minnesota this year, so my three plants still had only a few still short stalks ready when I wanted to pick some for a coffee dessert today. No strawberries in the house to fall back on the many strawberry-rhubarb recipes either, but I did have a half package of strawberry gelatin left from earlier baking, so here is the result.

Rhubarb and Apple Crisp

Filling:
1 1/2 c sliced rhubarb
2 to 2 1/2 c thinly sliced apples--I used HoneyGold
1/2 package strawberry gelatin (about 1/4 cup)
2/3 c sugar
1 t cinnamon

Topping:
3T butter
1/3 c brown sugar
1 t cinnamon
1/4 c flour
1 c old fashioned oatmeal

1. Toss all filling ingredients together until well mixed. Turn into a greased 8 or 9 inch pie pan.


2. Cut the butter into the sugar and cinnamon until well blended. Stir in the flour and oatmeal until all is well mixed. Spread over the filling, being sure to cover all the fruit.


3. Bake at 350 degrees for about 45 minutes, until the fruit is tender and the mixture is bubbly. (Insert a knife in the center to test for the tenderness of the fruit.) If the topping browns too quickly, loosely cover with aluminum foil for the last 15 minutes or so.

Serve warm or cold. Serves 5 to 6.

Wednesday, April 27, 2011

Pork Medallions in a "Special Sauce"

Way back when every housewife's Betty Crocker and Better Homes and Gardens Cookbooks had no listings for anything as "exotic" as cumin or basil, this recipe became one I could always expect to be complimented for, with the follow up question of "but what is that special flavor?"

Now, our tastes have all been much better developed, but this simple recipe still garners compliments. I am presenting it first in the form I used for many years and then with my modification of more recent years.


"Special" Pork Chops

"Traditional" version

canola oil
4 to 6 thin pork chops or pork steaks--about 2 pounds
juice of 1 orange OR 2 T frozen orange juice concentrate, undiluted
1 to 2 t grated orange rind (optional)
1 can cream of mushroom soup
1 t cinnamon
freshly ground pepper

1. Remove all excess fat from the chops. If boneless, cut into medallion sized pieces, about 3 inches around.
2. Brown the chops in a small amount of oil. When well-browned on both sides, spread with the mushroom soup and then sprinkle the remaining ingredients over the top.
3. Reduce heat to low, cover tightly, and simmer about 20 to 30 minutes, until the juices have turned rich brown and the meat is just tender.

Serve over mashed potatoes or rice. Enough for 4 to 6.


Updated version

canola oil
4 to 6 boneless, thin-sliced pork chops (I buy boneless pork loin and then slice it myself)--about 2 pounds
juice of 1 orange OR 2 T frozen orange juice concentrate, undiluted
1 to 2 t grated orange rind (optional)
1 t cinnamon
sauce (see below)

Sauce
2 to 3 T finely chopped onion
3 T flour
1 to 2 chicken bouillon cubes, crushed
1/3 c dry milk powder (optional)
1 to 1 1/2 c water
4 oz can sliced mushrooms or mushroom pieces--do NOT drain
freshly ground pepper
salt to taste

1. Saute the chops as in the recipe above. When browned, remove them to a platter.
2. Add the chopped onions to the drippings from the chops and saute until light golden.
3. Combine the flour, dry milk powder and crushed bouillon cubes, stirring to blend well. Add the flour mixture to the onions, and stir until completely mixed with the drippings.
4. Gradually add the water and mushrooms, including liquid, stirring constantly. Continue cooking until the mixture boils and is thickened. Season to taste.
5. Add the orange juice, orange rind, and cinnamon to the sauce.
6. Return the chops to the pan, and turn them over so that they are completely coated with the sauce. Cover tightly and simmer on low about 20 to 30 minutes, until the sauce is a rich golden brown and the meat is tender.

With either recipe, you may choose to put the meat and sauce in a tightly covered, oven-safe casserole and finish the simmering in a 325 degree oven for about 25 to 35 minutes.


Why the "Update?"

Although condensed soups have been around for years as a quick way to build a "casserole" or "hot dish" quickly, they no longer are as economical as they once were. In addition, many of these seem to have even more fillers with every "new and improved" change, so I have stopped using them almost completely.

The replacements for these soups are really not all that difficult or time-consuming to make, and they really are just glorified "white sauces." Back in the old days--you know, before electricity and the invention of the wheel, way back in the 1960s!--learning to make a good white sauce was a basic Home Ec lesson plan, so I have the good fortune to have practiced these long ago. But even those new to the technique will find it easy to do with a little practice and attention to a few very important details. In a future post, I will be spending a little more time on these sauces, hoping to give you the confidence to try them on your own.

And the flavor differences will be well worth the effort...Really!

A Quick Cake for Early Spring

Fresh strawberries have been reasonably priced this month, and our Easter breakfast potluck at church showed the result of this, with bowls and bowls of the brilliant berries lined up, sometimes mixed with cantaloupe and grapes, but even more often unadorned and beautiful.

That is probably the very best way to enjoy strawberries, but the cake below will also help you stretch a pound or so of berries to a dessert that will cut into 16 to 24 pieces. The recipe will also work with raspberries, and either of these kinds of berries can be used in their frozen form if they are not frozen in syrup.

Though the column on which this blog is based did not include "healthy" in the title (couldn't come up with an alliterative adjective to go with frugal, etc.), I try to keep that as a baseline assumption. Is this cake "healthy?" Well no, but it does have a little more going for it than the "poke" cakes from which it gets its inspiration. Most of these use fruit-flavored gelatin poured over the cake, with whipped topping covering it. My version adds in a little fruit and reduces the sugar-y gelatin substantially. So it remains cake, with lots of preservative-laden ingredients, so it is not something to be indulged in frequently. Still, for that occasional "cake occasion," it may be a better alternative than a two layer, frosting-laden dessert.

So here is today's frugal (if you buy the cake mix and topping on sale), fast, and fun dessert, with a touch of not-as-bad-as-it-could be nutritive value thrown in for good measure.


Strawberry Poke Cake

1 yellow or white cake mix (I made it this week with a spring confetti cake mix that had been on a post-Easter sale for 69 cents at Aldi)
eggs, oil and water
1 pound fresh strawberries, stemmed, washed, and cut into small pieces
1 to 2 T (about a third of a package) strawberry gelatin powder
3/4 c water (only 1/4 c for frozen berries)
8 oz container frozen, low fat whipped topping

1. Prepare the cake mix according to directions BUT use only half the oil and about 1/4 cup less water than called for.
2. Pour the batter into a well-oiled 9 X 13 pan--if you have a 10 inch round pan, this could be used for a more festive looking cake. You will be leaving the cake in the pan, so use your best looking one!
3. Bake the cake as directed.
4. While the cake is baking, combine the gelatin and water, stir well and microwave for about 2 minutes, until the gelatin is completely dissolved. Allow the mixture to cool slightly and then stir in the chopped strawberries.
5. As soon as the cake is removed from the oven, poke holes all across the top of the cake with a fork. Spread the berries evenly over the top, making sure that all parts of the cake are covered with berries and/or juices.
6. When the cake is well-cooled, spread evenly with the whipped topping and refrigerate until serving. If desired, save a few of the berries and top each piece of cake with a couple of berry slices.


A few added notes:

If using frozen berries: Allow to thaw only enough to chop the berries. Reserve all juices and add them with the berries to the gelatin mixture.

If substituting raspberries for strawberries, use raspberry flavored gelatin.

More strawberries can be added for an even more berry-flavored cake. There is no need to increase the gelatin or water when doing this.

Sometimes the cake will rise quite high in the middle. (Different brands seem to fill a 9 X 13 pan differently) If this occurs, you may want to take a large knife and slice off the rounded part of the cake so that the berries and juices do not all slide off the middle section. Another solution to this "problem" would be to bake the cake in two 7 X 11 pans or an 11 X 15 pan, increasing the berries and whipped topping to account for the increased area to be covered.

So what about the "leftover" ingredients, the unused part of the gelatin package and/or the part of the cake that is sliced off the top?

The gelatin:
Pour the remainder into a tightly capped jar, label and use for making this cake again.
Sprinkle over vanilla ice cream for a sparkly addition, or use as "sprinkles" on cupcake or cookie frosting.
Stir a teaspoon or so into a smoothie in which you might have otherwise used a bit of sugar.
For a little girl's birthday cake, I once added the gelatin not used for the topping to the cake mix itself. Very pink, very little-girlish.

The cake:
Crumble the pieces and dry by spreading them on a sheet. Then pop them in the oven after you've turned it off and have taken the cake out. When they are well dried, store in a tightly covered container in the freezer and use in place of graham cracker crumbs in a pie crust.
Or, easiest of all, leave the crumbs in a bowl on the counter and let everyone in the household know they are available for snacks.

Saturday, April 23, 2011

Eggs for Brunch, Potluck, a Family Supper

When eggs are on special (as they often are around Easter), buy a couple of extra dozen and put them in the refrigerator for use over the next several weeks. (If you are worried about keeping eggs so long, go to http://www.agr.state.il.us/programs/consumer/egg/eggconsguide.html for verification that eggs can be kept for an extended time if properly stored and cooked.)

The following recipe is easily halved, but the full amount makes a generous contribution to a potluck or feeds a houseful for brunch.

Vegetarian Strata

10 c cubed bread (see NOTE)
1 small onion, chopped
1/4 c diced red bell pepper--use fresh, frozen, or bottled
12 to 14 eggs
1/4 to 1/2 t cajun seasoning (OR freshly ground black pepper)
1 t mixed dried herbs (I used basil, rosemary, and thyme in equal parts)
2 t prepared yellow mustard
8 oz Colby, cheddar, or Monterrey jack cheese, divided
6 oz frozen chopped spinach

1. Oil an 11 X 13 baking dish. (If you choose to divide the recipe in half, use an 8 inch square or round container instead.)
2. Saute the onions in a small amount of canola oil until golden and translucent.
3. Beat the eggs with a fork or wisk until evenly mixed, as for scrambled eggs. Stir in the sauteed onions and all remaining ingredients except for about half the cheese.
3. Pour the egg mixture into the prepared pan. Top with the reserved cheese and cover tightly with foil.
4. Refrigerate for several hours or overnight.
5. Preheat oven to 350 degrees and bake strata, covered, for 25 minutes. Remove foil and bake for another 15 to 25 minutes, until a knife inserted in the center comes out clean. Serves 10 to 12.

NOTE:
For this recipe, which is really just a savory rather than sweet bread pudding, you can use all kinds of leftovers. Keep a container in your freezer for those ends of bread you don't otherwise use, the odd hot dog bun, the couple of rolls that didn't get used up last time you served them with dinner, even leftover garlic bread. If you don't have enough stored up ahead, any bread will work for this recipe, though the better the bread, the better the dish! For today's strata, I had a dozen clover leaf rolls available. I diced nine of them for the strata and will dry the rest for some seasoned bread crumbs.

You might also choose to save odds and ends of bread by drying them and then storing them in a tightly covered container. If you use dried bread for this recipe, you probably will want to add up to a cup of milk to the egg mixture.

About Those Hard-Boiled Eggs


Egg salad sandwiches. Hard boiled eggs with toast. More egg salad sandwiches....

Not ready with a lot of options for all those eggs you are spending today decorating and hunting tomorrow? Here are a few ideas for using them up.

(Of course, you did keep them refrigerated except for the hour or so--at most--that you were hunting them, right? If not, don't take chances; they need to be composted rather than eaten.)

But, for the safe eggs you want to incorporate into menus this week, an old-time vegetarian main dish salad and a variation on the tried and true Chef's Salad:


Kidney Bean and Egg Salad

1/3 c finely diced sweet onion
2 c (or 15 oz can) kidney beans, drained
3 hard boiled eggs, peeled and chopped coarsely
2 c diced or thinly sliced celery
Yogurt Dressing

Combine all ingredients with dressing. Taste for seasonings and adjust as needed. Chill for an hour or more to blend flavors. Garnish with parsley or serve on lettuce leaves if desired.

Yogurt Dressing

2/3 c plain yogurt
1 to 2 t prepared yellow mustard
3 to 4 t sugar (see NOTE)
salt or seasoning salt and pepper to taste (see NOTE)

Combine ingredients and mix well. This is very similar to "mayonnaise style salad dressing" that works well on old-fashioned potato salad or even as a sandwich spread instead of mayo.

NOTE: If using canned kidney beans, be aware that these almost always contain added sugar and salt, so don't add either of these ingredients to the dressing until you have tasted the salad to see how much will be needed.

One more thing--the serving suggestion in the photo above includes fresh orange slices. Keep in mind that the iron in plant foods (and kidney beans are a particularly good iron source) is far better utilized if you include foods rich in Vitamin C at the same meal.

Vegetarian Chef's Salad

Per main dish serving:
1 to 2 c baby spinach leaves, coarsely chopped
1 c iceberg or romaine lettuce, torn
2 T diced bell pepper (see NOTE)
sweet or red onion--2 t finely chopped OR thinly sliced and separated into rings
3 to 4 black olives, sliced
1 hard-boiled egg, sliced
1 oz cheese, your choice, grated or cut in fine cubes
1 T chopped parsley or fresh basil (optional)
vinaigrette dressing of your choice
freshly ground black pepper

Combine the greens, peppers and onions and toss in the black olives and cheese. If serving in individual bowls, arrange the egg slices over the top of each serving and sprinkle with the parsley or basil. Otherwise, fold the egg slices in with the olives and cheese, reserving a few for garnish on top. Serve the dressing at the table.

NOTE: This time of the year, fresh tomatoes rarely are very flavorful, and bell peppers can be quite price-y. If you are making this salad with good tomatoes available, by all means add them in. If, however, you don't have either tomatoes or red bell peppers, look for roasted sweet peppers in the pickle section of the market. These are often reasonably priced (compare the weight to the cost of fresh produce) and will keep in the refrigerator for several weeks, and they add a nice touch of color to salads and casseroles when we are really looking for some brightness in our menus.

And--if you have a Trader Joe's near you, look for their frozen pepper strips. These too are a reasonable alternative for casseroles and even salads when the price of fresh peppers might otherwise keep these wonderful vegetables off your table.

Quick and Curried--A Vegan Soup to Savor


While I usually make soups in vat-sized quantities, this one is so quick to fix that the single meal size recipe is well worth trying. As this picture suggests, it is truly a good to the last drop meal!


Curried Cauliflower Soup

2 t canola oil
3 oz chopped onion (half a medium onion)
2 1/2 oz green apple (1 small), finely chopped or grated
8 oz frozen cauliflower
1 small minced garlic clove
1 to 2 t curry powder
1 Knorr Vegetarian Vegetable bouillon cube (these are twice the size of usual bouillon cubes; if you use another brand, you will need two cubes)
2 c water

Saute the onion in the oil until translucent. Stir in the apple and continue cooking until slightly softened, about four or five minutes. Add all the remaining ingredients, bring to a boil and reduce heat to medium low. Simmer for about 20 minutes, until the cauliflower is tender.

This may be pureed or served as is. Serves 3 to 4 as a main course, 4 to 6 as a side.

(By using a vegan broth or bouillon cube, this goes all the way to vegan, if that is what you are looking for.)

Thursday, April 21, 2011

One a Penny, Two a Penny, Hot Cross Buns


Hot cross buns are a family tradition for us in Lent and especially during Holy Week. Thick with a basic powdered sugar icing, these are great for breakfast but go well at any other time of day as well.

As my family knows, I rarely measure my yeast breads but the following recipe was tested with carefully measured amounts--except for the flour! As with any yeast bread recipe, the amount of flour needed will vary, depending on the humidity on the day you are making the rolls (really!), the brand of flour, even the size of the eggs. So start with the amount given and gradually add more as needed.

Oh, and don't miss the NOTE at the end of the recipe if you are concerned about what temperature the water should be.

Yeast doughs may take a few trials for you to feel comfortable making them, but they are also very, very forgiving and flexible!


Hot Cross Buns

1 3/4 c water
1 1/2 t salt
1/4 c oil
1/4 to 1/2 c sugar
2/3 c dry milk powder
1/2 c quick oats (NOT instant--this is the stuff that comes in the traditional round cardboard boxes)
1 to 1 1/2 t cinnamon
1/4 t ginger
1/4 t nutmeg (optional)
2 eggs
1 c raisins
1 package instant dry yeast (or about 2 t yeast from a larger package)
4-5 c flour, to start--preferably at least half bread flour, but all purpose flour will be fine as well (up to 3 cups whole wheat flour may be used if desired--if this option is chosen, the rest of the flour should be bread flour for best resiliency in the dough)

Warm the water until just comfortable to the touch--in a much larger bowl than you probably expect to need--this stuff really grows! (Please see the NOTE below on getting the water temperature "just right.")


Stir in the salt, oil, sugar, dry milk powder, oatmeal and spices. Beat in the eggs and 2 cups of flour. Stir in the raisins and yeast along with enough additional flour (1 to 2 cups) to make a thick batter. If using whole wheat flour, add that now. Beat well with a wood spoon--the batter should start to get a rather smooth, silky consistency.

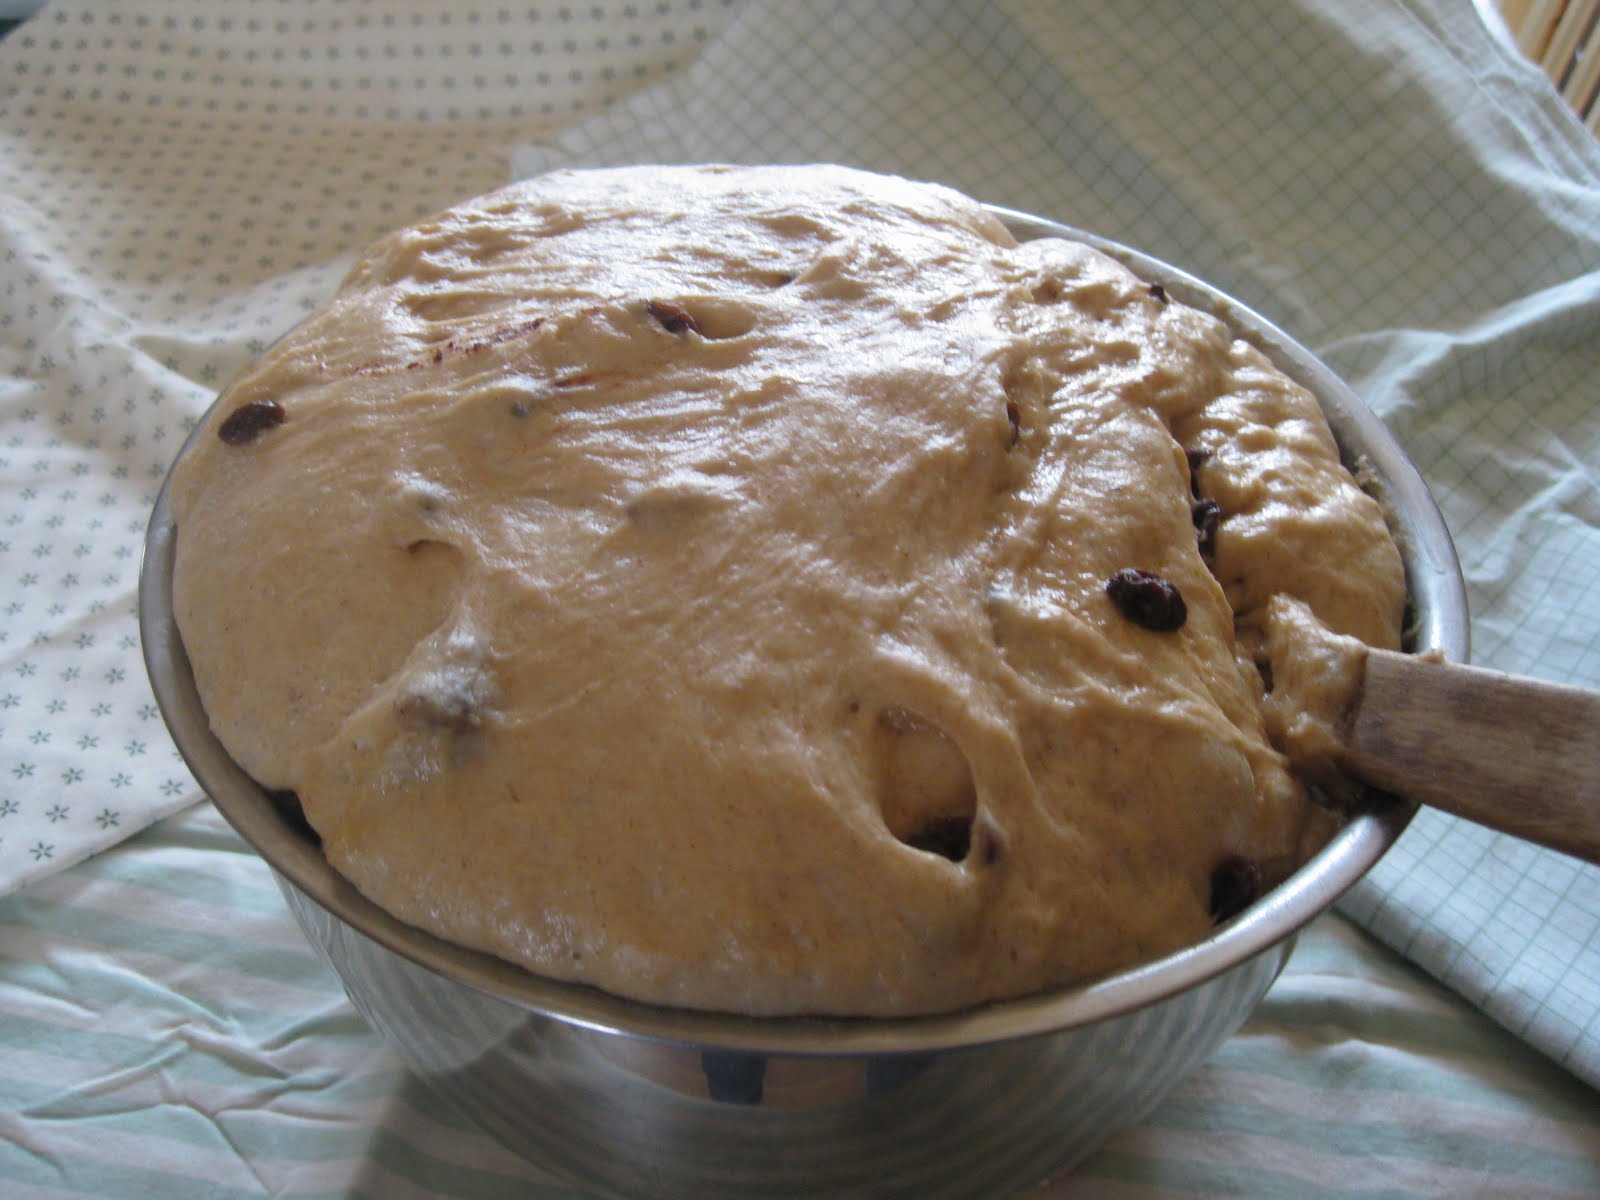
Set the batter in a warm location and allow to rise until bubbly and light--maybe an hour or so. Stir down and add more flour, a cup or so at a time, beating after each addition, until the dough is still soft but begins to "clean the bowl," that is, it clings together more than it sticks to the bowl.

At this point, you can either form the dough into rolls or you can punch it down and let it rise again. Truth be told, my dough often gets punched down many times, until I am ready to make the rolls. As I said, yeast doughs are flexible and forgiving, so you can--to a degree--make them conform to your schedule!

When you are ready to form the buns, oil two baking sheets. Then, with your well-oiled hands, pull off amounts of dough about the size of a golf ball or slightly smaller, and shape into round buns. You will probably need a little extra flour as you work, to keep the dough workable. Place on the pans with plenty of room for the dough to grow. Cover the pans lightly and let rise about an hour, until the buns have doubled in size.

Bake at 375 degrees for about 13 to 15 minutes. For a soft, glossy crust, brush buns with butter as soon as removed from the oven--note the difference in appearance:

For maximum freshness of your presentation, store the buns well-covered and decorate with the frosting crosses just before serving. Depending on the size of your buns, this will make about 2 dozen hot cross buns.

NOTE: 

Worried about what exactly is "just comfortable to the touch?" Here's the nice thing about yeast breads in general: as long as you don't kill the yeast from too much heat, you can start with a wide range of temperature!

So how do you make sure you don't kill the yeast? Two things in this method that can keep that from being a problem. First, you are going to "touch" the water. If you feel like you're burning your fingers, that isn't "comfortable," and that is too hot, so let the water cool a bit.

The other thing is that, when you've decided the water is "comfortable," even if that is hotter than the yeast might like, you are going to be adding a lot of other ingredients before the yeast goes in. That oil, those eggs, even the dry things like sugar and dried milk powder are all going to be cooling off the mixture. By the time you stir in the yeast, you are very, very, very unlikely to kill off the yeast from too much heat.

I know that the possibility of having your rolls fail because the yeast was killed by heat is genuine, but don't worry over much about this. Indeed, what might happen is that your mixture might end up being on the cool side. No worries with that either. The only downside would be that the dough might take a little longer to raise to doubling the first time through.


Powdered Sugar Frosting

2 to 4 T softened butter
2 pounds powdered sugar
1 t pure vanilla
milk

Stir a cup or two of the powdered sugar into the butter and add the vanilla and a tablespoon or so of milk. Beat this mixture until smooth. Then gradually add the sugar and milk alternately, beating after each. Be very careful not to add more than a teaspoon or so of milk each time, as the mixture will thin very quickly. Store covered in the refrigerator for a week or more.

Cream cheese can be substituted for all or part of the butter in this recipe. This can be used for cookies, cinnamon rolls, carrot cake, etc., with almond flavoring added to or replacing the vanilla and lemon or orange juice substituted for part of the milk.