Monday, June 22, 2015

Cherry Kuchen


This is an old, old recipe from my kids' Great Grandma, passed down and modified to slightly more modern measurements and instructions. "Put in a buttered coffee cake pan?" What size is that? And was a "cup" really a measuring cup, or just the closest coffee cup you could find? I've tested this a few times to be sure that it will work with our modern ingredients and measures, but I think the flavor ends up as comforting and fresh as the original.

This is adaptable to so many summer fruits. While the original called for "1 can sour cherries, drained," fresh or frozen fruit will be even better. As noted below, strawberries, raspberries, probably even blueberries (haven't tried those yet), peaches, nectarines, or some combinations of these can all be used. The amount of sugar might vary too--for very sweet fruits, perhaps only half a cup of sugar needs to be mixed with the fruit in step 1.

I have reduced the levels of fat in the recipe, but, if you want the richer version from the old recipe card, see the variation below. 

Whatever options you choose, this is a recipe that will be a nice variation from pies and crisps.

Cherry Kuchen

Crust
1/3 c butter (if unsalted butter is used, add about 1/4 t salt to this mixture)
1/4 c sugar
1 1/4 c flour
1 egg yolk

1.  Use a pastry blender* to mix the butter into the sugar and flour. Then stir in the egg yolk just until the mixture is evenly blended.
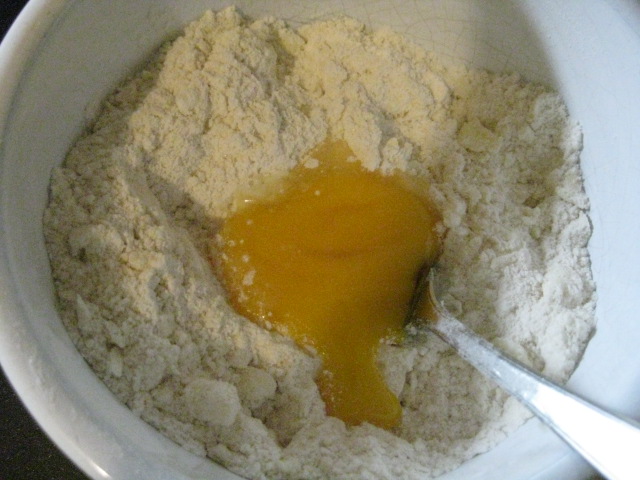

2.  Using your fingers, press the dough into a well-buttered 9 X 13 pan, working it up along the sides about half an inch or so.

* If you don't have a pastry blender, use two table knives, holding one in each hand, to cut through the butter, pushing the blades against each other.


Fruit Filling
1 pound (about 2 1/2 c) frozen cherries, slightly thawed--I used a mix of sweet and sour cherries from Costco; drain and reserve juices
1/2 c sugar (if using all sour cherries, use 3/4 c)
1/4 c flour

Custard Topping
1 egg + 1 egg white
1/4 c sugar
drained juices from fruit
1 c milk
1/3 c dry milk powder
1/2 t almond extract (optional)

1.  Mix the thawed and drained cherries with the 1/2 c sugar and flour. Spread the cherry mixture over the prepared crust.
2.  Bake at 425 degrees (400 degrees if a glass or thin aluminum pan) for 10 minutes.
3.  Meanwhile, combine all the custard ingredients, beating until smooth.
4.  Remove the cherries and crust from the oven and reduce the oven temperature to 350 degrees.
5.  Pour the custard over the top, and bake at 350 degrees for 25-30 minutes, until the custard is set. (You can test it by inserting a knife in the center. If it comes out clean, the custard is done.)

This can also be baked in two 8 inch pie pans, dividing all amounts evenly. The final baking step may be reduced by 5 or so minutes.


Variation, using fresh fruit

Reduce the flour added to the fruit to only 2 tablespoons. No need to drain the fruit before spreading over the crust and baking. When using fresh cherries, they should be chopped as well as pitted, as they tend to take longer to bake than some fruits.


Variation, using original recipe amounts

Use 1/2 cup butter in the crust.
Omit the almond extract.
Omit the dry milk powder and use half and half or evaporated milk instead of the milk. Actually, the really original recipe used "top milk" here. Farm wives who had their own, un-homogenized, milk, would take the cream from the top of each bottle for baking. Sometimes they might want to save some of that cream for butter or for whipping, so they would use part cream, part milk for their "top milk" recipes.

Other Fruit Possibilities

This recipe works well with strawberries, raspberries, blackberries, blueberries, or a mixture of any of these. Chopped or thinly sliced peaches or apricots may also be substituted.


Monday, June 8, 2015

Southwestern Chicken and Lentils


When I found chicken thighs on sale for less than 60 cents a pound, it was an easy decision to buy a "family pack" of 12 thighs. Braising them all meant that there would be lots of meat in the refrigerator to try out some new chicken options.

Along with plenty of prepared chicken, the pantry also held far more bags of lentils than necessary (story too long to tell here),  so I decided to find a way to use both chicken and lentils in a single main dish. 

My first thought was a curry (lentils always seem to make that an easy decision), but I couldn't quite get excited about that. A little searching for ideas on the internet brought up some Mexican-themed dishes, and I started looking in that direction. Chiles, tomatoes, corn; I had all of those, so why not try to make a dish that used lentils instead of the more typical beans? 

A little of this, a little of that, and I ended up with something that was not really a stew but not your typical Minnesota hot dish either. I served this with the homemade bread I had already baked, but this would probably be even better with warmed or crisped tortillas. Either way, it is a great main dish with lots of flavor and nutrition without a lot of effort.

Southwestern Chicken and Lentils

¾ c brown lentils (the kind most commonly found in grocery stores)
1 ½ c chicken broth
salt to taste (only if the broth is not salted)

chicken fat OR canola oil
1 medium onion, diced
½ red bell pepper, diced
2 carrots, sliced
3 to 4 cloves garlic, to taste, chopped or minced
1 15 oz can fire-roasted tomatoes
4 oz can green chiles
1 to 2 t cumin, to taste
1 t oregano
salt to taste
1 T cider vinegar
3 cooked chicken thighs, cut in large cubes (see method below for precooking, or use a rotisserie chicken if desired)
1 c  cilantro, chopped (see NOTE)
2 c  corn--if using frozen corn, no need to thaw first
2 to 3 c grated cheese--while cheddar or Colby can be used, there are many blends of "Mexican" or "taco" cheese that are especially good here


1.  Combine lentils and chicken broth and bring to a boil. Lower heat and allow lentils to simmer until very soft, about 20 to 25 minutes.

2.  Meanwhile, sauté the onions, bell peppers,  garlic, and carrots using some of the fat reserved from the chicken or canola oil. Cook on medium to medium high heat until the carrots are just beginning to soften. 

3.  Stir in the tomatoes, green chiles, cumin, oregano, and vinegar and return to a slow simmer. Continue cooking for about 10 to 15 minutes.

4.  Stir in the cubed chicken, lentils, cilantro, and corn. Taste and adjust seasonings as needed, and continue cooking for another 10 to 15 minutes.

5.   Just before serving, stir in the cheese or, if you prefer, pour the mixture into the serving bowl and sprinkle the cheese over the top. 

Serves 5 to 6.

NOTE:  
With no fresh cilantro in the house, I used frozen cilantro here, so the color is not as bright as it would otherwise have been. Frozen cilantro does not seem to be as flavorful as fresh, so I actually used a little more than a cup.


Preparing Chicken Thighs for Later Use

canola oil
chicken thighs with bones and skin
poultry seasoning
seasoning salt

1.  Remove most of the skins from the chicken thighs and place in a large skillet, along with a small amount of canola oil. Cook the skins over medium-high heat until they are crisp and brown. Lift the pieces of skin out of the oils, allowing to drain a bit over the pan. Discard.

2.  Place the thighs into the hot oil and sprinkle each piece with poultry seasoning and seasoning salt, to taste. Cook until well browned (about 5 to 7 minutes) and turn. Brown the second side and then add a few teaspoons of water, lower the heat to medium,  and cover the pan. Continue to simmer the chicken until it is tender, to the point of falling off the bone if desired. Remove from heat.

3.  Set the chicken pieces aside to cool. When the chicken is cool enough to handle, cut the meat off the bones and cut into pieces for later use.

4.  Pour off any juices left in the pan and set aside to cool. The fat that rises to the top may be used for sauteeing onions, and other vegetables as in the recipe above. The liquid will be a very concentrated chicken broth that is also a great resource for all kinds of dishes.


This method can be used for as many pounds of chicken as you wish, so consider cooking up a large amount and freeze the boned chicken in recipe-sized portions for later use. The chicken needs to be tightly wrapped (preferably double-wrapped) and used within only a month or two for best quality.

I prefer bone-in chicken thighs to other parts, as the meat is not as dry as chicken breasts, and the thigh bones are much easier to remove than those of drumsticks. Bone-in pieces are usually much lower in cost, and the bones add extra flavor as well.

Triple Berry Pie


Many years ago, I spent a summer working in the kitchen of a local country club. My job was preparing the cold foods. In that time of no pre-prepared ingredients, every day started with peeling and cutting into meticulously sized sticks 5 pounds of carrots, cutting pounds of cream cheese into cubes for garnishing some specialty salad, and washing heaps and heaps of romain lettuce.

Just across the kitchen from me was the large area given to Florence, the woman in charge of the home-baked breads and desserts that were a feature of the club's dining room. From her, I learned much about quantity cooking, and I still have a now tattered napkin on which I wrote some of her recipes that she tried to translate down to family-sized portions.

One of her specialties that appeared on the menu only when blueberries were in season was "Freshy Blueberry Pie." This featured the now standard method of preparing a glaze of part of the berries to pour over the rest of the berries that are simply washed and spread in a prepared shell. What made Florence's pie unique was that she spread a thin layer of cream cheese over the crust before putting in the berries and then the glaze.

For many years, I couldn't afford cream cheese, but I made blueberry (and then peach, strawberry, and raspberry) pies with the glaze and fresh fruit, and these were always favorites of family and friends. This week, I had some cream cheese that I wanted to incorporate into a fruit dessert, but a cheesecake would need more time and calories than I wanted to devote. Then I was reminded of Florence's pies, and I decided to try something new, using blueberries from the freezer, fresh strawberries on special this week, and some raspberry syrup in the refrigerator. The result was beautiful, refreshing, and a great end to a springtime supper with friends.

Note that slightly less than a package of cream cheese can be used. This is a good recipe to consider if you bought some cream cheese for another use and ended up with a partial package that doesn't work for any of those recipes that require the whole package. And you can use whipped cream cheese or the regular block form, whichever you happen to have.

Because not everyone has raspberry syrup on hand (but you really should try it if you have any kind of raspberry crop available to you!),  I have given an alternative glaze following the main recipe. Either way, this is an impressive dessert that showcases the fruit beautifully. It can be a frugal dessert choice too; buy the blueberries in season when on sale and freeze and then make this when the strawberries are at their seasonally low prices too.


Triple Berry Pie

 1 9” baked pie shell

Cream cheese layer
3/4 to 1 c low fat or regular cream cheese, softened (may use whipped cream cheese if desired)
1 T honey
¼ t nutmeg

Filling
2 T sugar
2 T cornstarch
2 T water
1 c raspberry syrup
2 t lemon juice
½ t almond extract
1 c blueberries—if using frozen, thaw slightly
8 oz fresh strawberries, sliced

1. Beat the cream cheese together with the honey and nutmeg until well blended. Spread evenly over the baked pie shell and set aside.

2.  Mix sugar and cornstarch until well blended and then slowly stir in water. Stir vigorously to be sure the mixture is smooth and no lumps remain. 

3.  Place the raspberry syrup in a large microwave-safe bowl (it will boil up, so be sure to use a large enough container). Gradually add the sugar mixture to the raspberry syrup, beating with a wisk or fork to be sure there are no lumps. 

4.  Microwave for 2 to 4 minutes, stirring occasionally, until the mixture boils and becomes translucent. Stir in the lemon juice and almond extract along with the blueberries. Allow to cool slightly.


5.  Meanwhile, slice the strawberries and arrange in a single layer over the top of the cream cheese. Pour the blueberry raspberry syrup mixture over the top, spreading evenly and pressing down slightly to be sure the fruit mixture surrounds the strawberries completely.

6.  Allow to chill at least two hours.


Variation without Raspberry Syrup

Prepare the following mixture and use in place of the raspberry syrup in the main recipe.

1 1/2 c raspberries, fresh or frozen--if using frozen, include all juices
3/4 c sugar
water

Put the raspberries in a measuring cup and add water to fill the spaces so that there is a full 1 1/2 cups of berries and water.

Combine the raspberries, water, and sugar in a large bowl (the mixture will boil up) and microwave for about 3 minutes, until the berries are very soft. You may also cook the mixture on the stovetop, cooking for about 8 to 10 minutes.

Pour the mixture into a colander or sieve to strain out all or most of the seeds. Measure out a cup of the mixture to use in the main recipe.

Double Berry Pie

Substitute strawberries for raspberries in the variation above.


Wednesday, May 27, 2015

Spanish Tortilla


Not long ago, I saw a reference to a "Spanish tortilla," something very different from the tortillas we associate with Mexican dishes. While in Barcelona Spain recently,  I had an opportunity to try some "authentic" tapas, including the "Spanish tortillas" I had heard about.

As with almost all the tapas we tried, these were delicious, so I came home ready to do more research into making my own. Following is what I found to be a real favorite for our family, something that would make a great brunch dish or even a light supper. Because of the typical Spanish custom of serving this at room temperature, it could even be a good potluck dish--though I would not want to leave it at room temperature for an hour or so.

This version is larger than the tortillas served as tapas. Those were more individually sized, and some had a layer of sliced tomatoes under this potato egg dish. This one would be best served as narrow wedges, something like you might serve a quiche. There is just a small challenge in getting the finished dish out of the pan in one piece, but using enough oil in a well-seasoned cast iron skillet made the job pretty easy.

This is good just as is, but either a little salsa or pesto (like this one:  http://frugalfastfun.blogspot.com/2015/05/cilantro-and-spinach-pesto.html) can also be a good accompaniment.

Spanish Tortilla

11 oz potatoes, thinly sliced (2 medium), app 2 c when sliced
4 oz chopped onion (1 c)
2 cloves garlic, chopped
½ t salt (will probably want more)
black pepper to taste
¾ c olive oil
3 eggs

Method:  
1.  Add all the oil to a skillet and begin to warm over medium heat. Add potatoes, onions, and garlic and season with salt and pepper. The oil should almost cover the potatoes. Cook slowly until the potatoes are just tender, probably about 12 to 15 minutes, stirring gently a few times. Remove from heat and put in a colander to drain until just warm. (Save oil for re-use.) 
2.  Meanwhile, beat the eggs in a large bowl until the mixture is uniform in color. Stir the just warm potatoes into the eggs. Heat the oven to 375 degrees in preparation for the final step.
3.  Add just enough of the reserved oil to be sure skillet is just covered with a sheen of oil. (You don't want a lot, but you also want to be able to turn the tortilla out of the pan in one piece!) Heat the pan to medium high.
4.  Pour the potato mixture into the pan and spread out evenly. Cook for about 5 minutes, using a spatula around the edges to occasionally loosen the eggs from the pan. 

5.  When the edges begin to look set and cooked but the center is still liquid, place the skillet in the pre-heated oven and allow to cook another 8 to 10 minutes, until the center is fully set.


6.  Remove from oven and turn onto a plate, using a spatula as needed to gently loosen the tortilla from the pan in one piece. May be served hot or, apparently typical in Spain, at room temperature. 


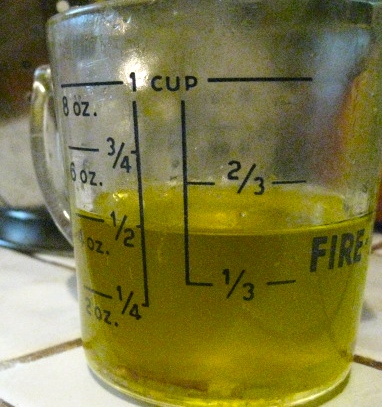
Note that the reserved oil amounted to a full half cup, so the total used in this recipe was "only" a quarter cup. The oil that remained was nicely flavored with the onion and garlic, so it will be useful for sauteeing vegetables, etc.


Update on June 22, 2015:

I can't resist adding this link with more info on Spanish tortillas:

http://www.nytimes.com/2015/06/21/magazine/the-king-of-tapas.html?rref=collection%2Fsectioncollection%2Fmagazine


Sunday, May 17, 2015

Cilantro and Spinach Pesto

(From the archives--originally posted May 17, 2015)

Last week there were still some great specials on really beautiful bunches of cilantro, so I picked up some extra. Now, how to use all of it?

Of course there is Amy's great Tortilla Soup (found here:  http://frugalfastfun.blogspot.com/2012/02/give-thanks-for-thanksgiving-soups.html), and refried beans are always improved by cilantro. For now, I wanted to try a pesto using cilantro, something I had heard of but had never attempted.

I keep fresh spinach in my refrigerator as much as possible, so pairing spinach and cilantro seemed a good place to start. I ended up with the following adaptation of several different recipes I reviewed, and it proved to be a real winner.

When cilantro and/or spinach are on special, this can also be a fairly frugal recipe, especially since a typical pesto serving is quite small...and the nutrient load here is really, really good. Spinach, cilantro, almonds, olive oil; all top dogs in any list of healthy foods.

Now that you have made pesto, what are you going to do with it? I served it with a Spanish omelet, a great combination--here's my take on that:

http://frugalfastfun.blogspot.com/2015/05/spanish-tortilla.html

This pesto would also make a good topping for crostini or many kinds of crackers. Its brilliant green color would make a good contrast to a black olive tapenade or various white or cream colored spreads or dips. Many people enjoy pesto as a topping for pasta, and that would be a good use too. And some lightly braised or steamed fish would be great with a bit of pesto to zip up the flavor.

What about mixing a little of this with the yolks of boiled eggs to make special deviled eggs? (Green eggs without ham?)

Wherever you may have used traditional pesto would be a good place to try this one too. Lots of ways to use this, so go ahead and make a sample batch the next time you have some good cilantro and spinach available.

Cilantro and Spinach Pesto

3/4 c slivered almonds (see NOTE)
1 c tightly packed cilantro--use both leaves and stems, chopping it coarsely
1/2 c tightly packed spinach leaves
1/3 to 1/2 c grated parmesan cheese, depending on your preference
4 garlic cloves, coarsely sliced
1/4 c lemon juice (the bottled kind like ReaLemon is fine for this recipe)
salt--start with about 1/4 t and then adjust to taste
black pepper to taste
olive oil


1.  Pulse the almonds lightly in a processor bowl until coarsely chopped.
NOTE:  You may substitute whole almonds with skins still on, but you will need to chop the nuts more thoroughly, and there will be flecks of the brown skin through the pesto. Not unattractive, just different.
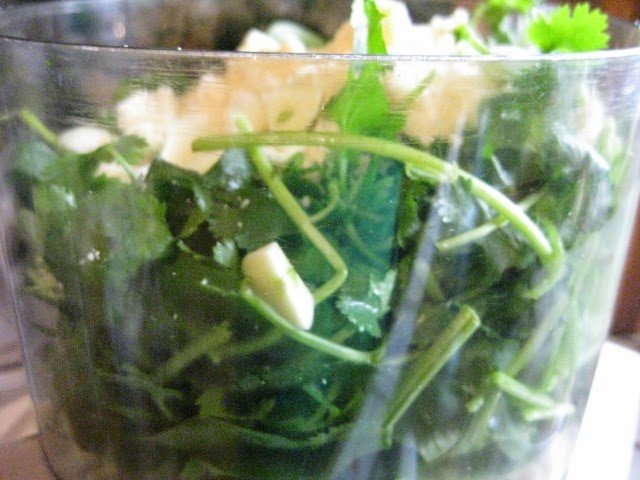
2.  Add the cilantro, spinach, garlic, parmesan, lemon juice, and salt and pepper to the almonds. Pulse until the mixture is coarsely chopped.

3.  Gradually drizzle olive oil on to the chopped mixture, processing until the mixture is smooth and a soft paste. Taste for seasonings and adjust.

Makes about 1 1/2 to 2 cups.

This may be served immediately or refrigerated for several days.


Saturday, May 16, 2015

Rhubarb Coffeecake (made with mayonnaise)


Here in the upper Midwest, we are seeing more and more poultry farms hit with a dangerous avian flu virus that has killed hundreds of thousands of chickens and turkeys, and there are predictions of sharply higher egg prices coming, so it seemed like a good time to try substituting mayonnaise in one more recipe. Since the rhubarb is ready for harvesting, this coffeecake seemed the perfect recipe for an experiment.

I try to use mayonnaise only where other, stronger flavored ingredients will predominate, and I kept butter in the topping for its distinctive flavor. The texture of this cake is lovely, a little dense but very moist. While the ingredients list may look a little long, this is extremely easy to put together. As I have noted in earlier rhubarb recipes, my plants have little red in them, so you may end up with a much more colorful cake than mine.

Crumb-topped Rhubarb Coffeecake with Mayonnaise


Rhubarb Mixture
2 c (8 oz) diced rhubarb
1/4 c sugar
2 t cornstarch
1/2 t ginger
1/2 t cinnamon

Cake Batter
1/2 c mayonnaise
1/2 c sugar
1 t vanilla
1/2 c plain non-fat yogurt
1 c whole wheat flour
1 c enriched flour
1 1/2 t baking powder
3/4 t baking soda

Crumbs
1/4 c butter, melted
1/2 c brown sugar
3/4 c flour
2 t cinnamon
1 t ginger

1.   Toss together the rhubarb, quarter cup sugar, cornstarch, ginger, and cinnamon until well mixed. Set aside while making the batter.
2.  Cream together the mayonnaise, sugar,  yogurt, and vanilla.
3.  Stir in the prepared rhubarb, blending well.
3.  Sift the flour and baking powder and soda together and fold into the rhubarb mixture. Stir just until evenly blended; do not overmix.


4.  Generously oil a 7 X 11 inch pan. Pour in the batter and spread evenly.
5.  With a fork, mix the butter, brown sugar, and spices until well blended. Add the flour and continue to mix just until large crumbs form. Using your fingers, distribute the crumbs evenly over the top, pressing them into the batter just slightly.
6.  Bake at 350 (325 for a glass pan) for 30 to 35 minutes, until a toothpick inserted near the center comes out clean.


Variation

If you really, really like the crumb topping, spread the batter in a 9 X 12 pan and double the topping amount. This is likely to be done in 22 to 25 minutes.

Wednesday, May 6, 2015

Cranberry Streusel Coffeecake--made with mayonnaise


Yes, it's time for another recipe using mayonnaise in place of oil and eggs. Now that picnic season is upon us, the stores are featuring specials on mayonnaise, so it's a good time to pick up a jar just for baking, even if you never use it for anything else.

This recipe is adapted from one that I first made while still in high school, so you know it is very old. Using mayo instead of butter in the batter and omitting the egg resulted in cutting the overall cost of the coffeecake almost in half. I haven't been brave enough to use mayonnaise in the crumb topping--I think the flavor of the mayo might be a little too strong to use there--so there is still some butter included.

It is nice to have a recipe like this on those days when you have run out of eggs and still want to stir up a homemade bread for a special weekend breakfast or for when friends come over for coffee. It goes together quickly and could be a good one to make with kids who are just starting to want to help in the kitchen. The cake is quite dense, not too rich, and could be appropriate for vegans with the variation noted below.

If you've consulted my blog before (and I do hope you visit often!), you will notice that I have used dried milk powder, a staple in my kitchen. Why? There are several reasons.
  • If you read the instructions on the dried milk package, you will find that one third cup of the powder is the equivalent of a cup of milk, yet this recipe only needs one half cup of liquid. By using the powder, I can add extra protein and calcium.
  • If I were to heat the milk with the cranberries, there is very likely going to be a"boil over" in the microwave, and I really like to avoid that kind of mess.
If you don't have dried milk, you can either use just water (slightly less full flavored) or use milk and take your chances on the heating. OR, you could just skip the cranberry soak. However, this step softens the cranberries and helps make sure they stay well-mixed in the final batter.


Cranberry Streusel Coffeecake
½ c mayonnaise
½ c brown sugar
1/3 c nonfat dried milk powder
½ c water
½ c dried cranberries
1 t vanilla
2 c flour
2 t baking powder
½ t soda
½ t cinnamon
¼ t nutmeg

Crumb topping
¼ c butter, melted
½ c sugar
¼ c flour
½ c oatmeal
1 t cinnamon

1.  Heat cranberries in water in microwave for 1 to 2 minutes and set aside to cool.
2.  Combine mayo, brown sugar, milk powder, cranberries and water. Beat well.
3.  Sift the dry ingredients together and fold into the mayonnaise mixture. Stir just until evenly blended.
4.  Spread the batter into a well-oiled 8 inch square pan.
5.  Combine all crumb topping ingredients and spread over batter.
6.  Bake at 350 degrees for 35 minutes.

 Variations:
  • Replace the cranberries with raisins (a mix of golden and regular raisins would be nice), dried cherries, or even chopped dried apricots.
  • Add 1/3 to 1/2 c chopped pecans or walnuts to the crumb topping.
  • For a Vegan Coffeecake, omit the dried milk, use vegan mayonnaise, and a non-dairy margarine in place of the butter. 


Wednesday, April 1, 2015

Curried Cabbage and Carrots


I am still working through a pretty large stash of cabbage from the St Patrick's Day specials (17 cents a pound!) a few weeks ago. Cabbage is one of those wonderful vegetables that can be stored in the refrigerator for weeks--not to mention my "root cellar" garage where I felt like a pioneer when cabbages bought at the end of last year's season were still solid and tasty at the beginning of March.

Now, what to do with all of those bright green heads? I pulled off the thick outer leaves and put them back in the crisper for some stuffed cabbage leaves next week. A big batch of overnight cole slaw has also been shared with friends and is continuing to serve as a side with lots of other meals. There will be vegetable soups soon, along with stir fries, but today I was hungry for something curried.

A web search turned up lots of curried cabbage recipes, so I started with some of these and added my own touches. Since I almost always have carrots--also able to be stored for weeks in the fridge--they could be added, for their color and all the Vitamin A and antioxidants that yellow and orange vegetables bring. While this dish is fine with just green cabbage, I had a bit of red cabbage on hand. Along with half a green bell pepper, this would make this a really colorful side dish.

With all the great vitamins, antioxidants, and fiber, don't forget that this does not contribute much protein or B vitamins, so it should be paired with some other healthy options to make a "complete" meal. Not hard to do, as brown rice is a great side dish, and a dollop of yogurt is a great topping. Stirring a can of your favorite beans (black beans are especially attractive) into the vegetables before serving is another good way to supplement the dish--both in terms of nutrition and good taste.

Though I didn't have any marinated tofu on hand, that would also be a good add-in...maybe I can add some to the leftovers. Since this mixture reheats well in the microwave, I can easily try one or more of these variations later.


 Curried Cabbage and Carrots

1 to 2 T olive oil
1 large carrot, sliced--about 1 to 1 1/2 c total
1 medium onion, chopped--about 1 c
 2 to 3 t curry powder, to taste
water
3 to 4 c shredded cabbage (about 1/2 medium head)
1/2 green bell pepper, diced (about 1/2 c)
2 to 3 minced garlic cloves, to taste (may use bottled minced garlic if fresh not available)
1/2 t ground ginger, to taste
1/2 t salt
1/2 c chopped cilantro, stems and leaves (optional)

1.  Put enough oil in a large heavy skillet to just cover the bottom. Heat over medium high heat until the oil is just shimmering.

2.  Add the carrots and onions and saute for about 5 minutes, until the onions are just beginning to turn golden.

3.  Stir the curry powder in and allow to simmer 2 to 3 minutes, until the mixture is very fragrant. Add the garlic, ginger, salt, and 1/4 cup of water and stir to make a kind of curry paste with the vegetables.

4.  Bring the mixture back to a gentle boil and stir in the cabbage, green peppers, and about 1/3 cup more water. Stir to mix, cover, and simmer about 15 minutes, until the cabbage is just tender, stirring occasionally. For best flavor and results, don't overcook!

5.  About 5 minutes before serving, add the cilantro if used and taste for seasoning, adding salt and more curry powder as needed.


Serves 6 as a side dish.


Tuesday, March 10, 2015

Applesauce Oatmeal Cookies


A long time ago, I had a Home Ec teacher who explained there are three basic kinds of cookies: chewy, crisp, and cake-like. These old-fashioned oatmeal cookies are definitely in the cake-like group, soft and moist and full of flavor.


They are also relatively healthy (though still with enough sugar that they definitely should stay in the "special treat" category of your family's menus). This is an adaptation of a recipe I found in my mother's church cookbook from the early 1930s. Originally they called for one and a half cups of butter. Substituting unsweetened applesauce, cutting back the sugar,  and increasing the spices improved the nutrititive value without compromising flavor at all.
 
 Applesauce Oatmeal Cookies

1/2 c butter
3/4 c brown sugar
1/2 c white sugar
2 eggs
3/4 c unsweetened applesauce
2 t vanilla
3 c flour
2 t baking powder
2 t cinnamon
1/2 t nutmeg
2 1/2 c old-fashioned or regular oats (oatmeal, NOT the instant kind and NOT steel cut)
1 c dried cranberries
3/4 to 1 c chopped walnuts (optional)

1.  Cream butter and sugars together. Stir in the eggs and then the applesauce and vanilla. Blend until very smooth and light.
2.  Sift the flour, baking powder, and spices together and add to the egg mixture. Stir until well blended.
3.  Mix in the cranberries and nuts and then add the oats gradually. Continue to stir until the oats are evenly blended in.
4.  Drop by spoonfuls on to a greased baking sheet and flatten lightly with the back of a spoon. Bake at 350 degrees for about 10 to 15 minutes, depending on the size of your cookies.

Makes 3 1/2 to 5 dozen cookies, depending on the size you make. For those in the picture, I scooped out balls of dough a little bigger than a golf ball, with a yield of 40 cookies.

Variations:

Replace the dried cranberries with raisins or dates.

For a very different texture, put the oats and raisins in a processor and blend until quite fine. This works very well if you have family members not especially fond of raisins.


Saturday, March 7, 2015

Tackling Those Hard-shelled Butternut Squashes


I'll admit it. For years, the only way I ever prepared butternut squash was to roast them whole and then scoop out the flesh from the finally softened peelings. Sometimes I would be so brave as to cut them in half, take out the seeds, and turn them upside down on a baking sheet to speed up the roasting a bit, but every push of the knife into those wobbly pear-shaped things raised my anxiety level to a fever pitch.

You do need to understand my history around sharp objects is not a really good one, and I have a string of anecdotes about kitchen mis-steps and subsequent stitches, so my fear was not entirely groundless. Still, as a result of my conservative approach, I was missing out on some really good recipes. Finally, when I came into a stash--an entire bushels-worth!--of deep yellow butternut squash one fall, I knew I needed to try some of the great recipes I had seen that called for diced or even shredded squash.

Now, several years later, my fingers all firmly intact and not even slightly gashed, I have some suggestions that might help you if you also fear these hard-shelled garden treasures.

(Scroll all the way to the end for a hint of how your microwave might be of help with this whole process. There are also some links there that include a few recipes to try with your cubed squash.)

To start, you need the right equipment. A large cutting board is important, preferably wood, as it is less likely to slide around than the thin plastic sheets, and a glass cutting board is too hard on your knives.


Next, you need to select the right knives. Contrary to what many cooking shows would have us believe, you don't always need great big knives. In fact, too large a knife for some tasks can be downright dangerous. On the other hand, you should have a large, relatively heavy bladed knife for doing the initial "hacking" up of your squash.

As you can see in these pictures, I use two different knives for getting my squash cut into cubes. The larger one has a serrated blade (reluctant admission: it is a "ginzu knife" I bought at a supermarket demonstration, one of the best bargains I have made in my cooking career). I like the serration because it seems to grip the flesh of the squash with less likelihood of slipping off the side of the squash. If you have a large "chef's knife" or even a heavy, serrated, bread knife, these can work well too.

Another advantage to serrated (or "granton edge," wavy bladed) knives is that they tend to keep their sharpness. It is not an old wives tale that dull knives can be more dangerous than sharp ones. When cutting into a squash, you want to start gently and push slowly, without too much pressure, so that the blade doesn't suddenly slip off the squash--and likely right on to the hand you are using to steady the thing!

For whatever reason, most of us seem to think of cutting squashes like these in half from top to bottom, and that is the way I first learned to cut them. However, a far easier, and safer, way to cut is to begin at the top of the squash and cut slices, as though you are cutting bread. Saw gently into the squash about an inch or so from the top and then continue slicing until you reach the seed "bowl" at the bottom.


When you reach this bottom part, you can either leave it as a "bowl," scooping out the seeds and baking it with a stuffing, much like you would stuff an acorn squash. However, if you just want to use this part of the squash along with the rest, cut the bowl in half (or if very large, in quarters) and scoop out the seeds. An ordinary tablespoon or a grapefruit spoon can be the best tool for this.


Now that you have the slices cut, you could just put them into a roasting pan coated with some oil, cover them with foil, and roast at anywhere from 375 to 450 (your choice) until they are soft, with the flesh easily pierced with a fork. Remove from the oven and, as soon as cool enough to handle, slip the peelings off easily with a small knife.


If, however, you want to cube the squash for use in sautes, an Indian curry, etc., you now need to peel them. Remember when I mentioned having the right tools? Now is the time for a small, but still very sharp, knife, definitely nothing too big. You need a good paring knife--paring as in paring, removing the peel from something, right? Good.


Now here is the next step that I almost hesitate to share. The easiest way to peel these pretty rounds of squash is not to use a cutting board. Instead, you are going to use a time-honored and potentially dangerous method. You are going to take the round of squash in one hand and then gently take the small but sharp knife in the other hand and begin cutting the peeling off the squash slice, pulling the blade toward yourself.

Some key words: A sharp knife and a gentle cut. You don't want to push too hard with the knife or try to cut too fast. However, once you have tried this a few times, you will see that it is really not very difficult at all. In fact, it is much, much easier than slashing downward on the squash while it sits on a cutting board.


Once you have the slices peeled, you can now cut them into cubes. Maybe the better word is chunks, since the irregular shape of the squash is going to mean that the pieces are going to be only roughly the shape of a mathematically perfect cube, and that is perfectly okay. The key is to keep them uniform enough that they will be finished cooking at about the same time.


To cut the slices quickly, cut a slice (or oval from the bowl-shaped section) into long strips and then line the strips up next to each other on your cutting board. Use your large knife to cut through several of these strips at a time. Do NOT try to stack the slices on top of each other, as they are slippery and too easily slide off such a stack and, again, possibly right on to the fingers you are using to steady the slices. (Not that I have any experience with such an event of course!)


In no time at all, you will have a large supply of cubed squash ready for all kinds of cooking adventures. Even a medium squash will provide enough cubes for several recipes. Packed into a plastic bag, the uncooked cubes will keep in the refrigerator for a few days, so you can try out a couple of different dishes with your stash.

I don't recommend freezing the raw squash cubes. If you discover that your squash is going to yield way too many cubes to use right away, you might want to peel and cube just enough for what you need and roast the rest of the squash slices as noted above. Once the squash is roasted, it can be mashed or pureed and then frozen for recipes that call for this form.

A few recipes you can try using your cubed squash:

Barley with Butternut Squash and Apples

Braised Vegetables

My Daughter's Great Tree Hugger Chili

You Have to Try It to Believe It Soup

Now, the Microwave Hint

If you still find it very difficult to peel your recalcitrant squash, you may want to try this approach. Wash the squash and pierce it in several places, especially around the seed cavity section. Place the squash in the microwave and heat it on full power for one to three minutes, depending on the size of the squash. You are not trying to cook it, just getting it ever so slightly softer so it will be easier to cut. Take the squash out of the microwave and allow to cool just long enough to be comfortable handling it. Now, it should be just a little less hard as you proceed with the steps above.