Friday, November 16, 2018

Apple Banana Cake


Sometimes, the bananas all seem to ripen (or over-ripen) at once. When a couple of spots develop on those apples in the crisper drawer at the same time, it might just be time for a dessert that uses up both these kinds of fruit.

This cake is super moist and is the kind that really doesn't need any kind of frosting--though ice cream lovers no doubt can be coerced into adding a scoop of vanilla bean on the top, especially if the cake is still warm from the oven.

This goes together quite quickly, except for chopping or grating the apples. As I noted with the Apple Gingerbread I just posted, this is the time to use a small food processor or chopper like the one that came with my immersion blender. But if you don't have any electric appliance like that, it still doesn't take too much time to grate or finely chop the apples, and the results are well worth it.


Apple Banana Cake
Ingredients

1 1/2 c sugar (may use part brown sugar if desired)
1 c mashed banana--about 2 to 3 medium bananas
1/2 t vanilla
12 c canola oil
2 eggs
2 c flour
2 t baking soda
1/2 t salt
2 t cinnamon
4 c cored and chopped apples (press into cup lightly)

12 cup of chopped walnuts (optional)


1.  Combine sugar, banana, oil, eggs, and vanilla in mixing bowl and beat together until thoroughly mixed and light in color.
2.  Sift the flour, soda, salt, and cinnamon together (or still together well in a separate bowl from the egg mixture).
3.  Add the flour mixture to the liquid ingredients and stir just until completely mixed. Fold in the apples and nuts and continue until stirring until the apples are evenly distributed throughout the batter.
4.  Pour the batter into a 9 X 13 pan that has not been oiled. Bake at 350 degrees for 35 to 45 minutes until a toothpick inserted in the center comes out clean.

-->

Apple Gingerbread


Novembrrrrr.

This has been a pretty chilly fall here in the upper Midwest, and a winter storm advisory has just been posted for tonight, with perhaps 3 to 5 inches of snow in the forecast....And I still haven't finished clearing the last (I hope) layer of leaves off of my deck.

What better time to fill the house with the warm fragrances of fall. Apples. Cinnamon. And ginger, All it took was the featured price of molasses at Aldi--about half the cost from the other stores in town--for me to begin thinking of homemade gingerbread.

Now my mother's old, old recipe for gingerbread is reliable and great, but I wanted to see if I could add in some of the many apples I have right now. Off to the internet, where I found that most of the recipes for "apple gingerbread" were for upside-down cakes, with a layer of caramelized apples put in the pan, with the gingerbread batter poured over. Not a bad idea, but it wasn't what I had in mind.

I finally found something similar to what I was looking for, so I started experimenting and came up with this version. So far, all those who have tasted it have given it rave reviews, so I hope you will find it equally delicious.

One note:  Probably the longest part of the preparation here is chopping or grating the apples. If you have a small food processor, or a chopping attachment like this one for my immersion blender, use it! This is a time when those little extra kitchen appliances can really be worth having.


Apple Gingerbread
Ingredients
  • 1 egg
  • 1/2 c packed  brown sugar
  • 1/2 c canola oil
  • 2 T frozen apple juice concentrate (see NOTE)
  • 1/2 c molasses
  • 1/3 c water
  • 2 c flour
  • 2 t baking powder
  • 1 t soda
  • 1 T cinnamon
  • 1 T ground ginger
  • 1/2 t salt
  • 2 c coarsely chopped or grated apples--about 1 pound or so; press the apples a little into the cup

Directions
1.  Combine the egg, brown sugar, and oil and beat together until well mixed. Stir in the molasses, apple juice concentrate, and water until fully incorporated. 
2.  Sift or whisk together the dry ingredients and gradually add to the liquid mixture. Stir until completely blended. Fold in the apples.
3.  Pour the batter into a 10 inch round pan or a 7 X 11 pan that has been well oiled or sprayed with cooking spray. 
4.  Bake in a 350 degree pre-heated oven for about 38 to 45 minutes, until a toothpick inserted in the center comes out clean.
5.  Allow to cool about 5 to 10 minutes before turning out of the pan.  Notice the cracks in gingerbread top below; there is nothing to worry about when this happens--really!  


This may be served warm or cold--but the very best way is when it is still warm, with a good dollop of whipped cream on the top!


NOTE:  If you don't have apple juice concentrate, substitute 1/2 cup apple juice or cider for the juice concentrate and water.


-->

Thursday, November 8, 2018

Grandma's California Vegetable Casserole

(The following post is from 2017 but still captures a bit of the story of a very traditional part of our year end holiday meals--all of them!)

This year, work conflicts meant that all of our immediate family couldn't gather on Thanksgiving day for the usual feast, so we would need to celebrate the holiday on two different days. As we began planning for this change, someone suggested that we might split the menu between the two dinners as well as the "guest list."

Thanksgiving dinner in the US is one of the most tradition-bound of all meals, and we all have favorite sides that we expect to include in this November feast. When more than a few people contribute all these "must-have" dishes, the result is far more food than any of us really need at one time. Cutting the number of choices at each of our two dinners was a wonderfully workable way to enjoy our favorites without the usual over-stuffed feeling at the end of the meal.

We have a significant number of vegetarians in our crew, so it was an easy decision to make a vegetarian "turkey" the centerpiece of the first dinner. Then there were unadorned roasted sweet potatoes, Grandma's California Vegetable Hot Dish, fresh cranberry sauce, cranberry apple bread, tossed salad, and, of course, two choices of pie.

For the Thanksgiving Day meal, we had roasted turkey, vegan stuffing, a different cranberry relish, mashed potatoes and gravy (turkey and vegetarian), sweetened sweet potatoes, that traditional green bean casserole topped with fried onion crisps, rolls, and, again, two choices of pie.

Actually, looking at these menus and remembering the meals, these were still very, very full menus, and we were right to make this the only real meal of the entire day each time we celebrated. For us, having the feast in early afternoon means that the pies are held for a few hours and become like a second meal, later in the evening.

All of this description is a lead up to today's recipe, one that works well for all those year-end holiday potlucks, or even as a side if your family has a large Christmas dinner planned. My children's Grandma Laack always included her California Vegetable Hot Dish when we were able to come home for Thanksgiving or Christmas, and it quickly became a traditional side dish for any of our winter holiday meals. When asked the source, she once told me she had just gotten it off the side of some package--probably the Velveeta. Oh, but then she started to think; no, maybe I heard it on WHBL, a local radio station that had a long-running call-in program that featured a lot of recipes over the holidays. Or maybe, she thought, in the Plymouth Review, the local paper with a weekly recipe column, stacks of clipped-out recipes that were in some boxes of Grandma's other "clippings."

The source that I used came directly from a handwritten copy that Grandma had given my daughter-in-law many years ago.


Grandma's California Vegetable Hot Dish

16-20 oz pkg California style vegetables (broccoli/cauliflower/carrots)
1 can cream of mushroom soup diluted with ½ can of milk
8 oz velveeta- cut up
seasoned salad croutons
½ c melted butter [that note just above the ½ c that looks like “2T”—could it be a change Nadia made, or Grandma?]

Mix all ingredients and top with browned croutons. (Can microwave vegetables first). Then bake at 350 degrees until browned.

Thursday, October 18, 2018

Vegan Chocolate Applesauce Cake


While my diet leans heavily toward the vegetarian side, I am not a vegan and don't generally stock some of the foods that show up in so many vegan recipes--no vegan chocolate chips, vegan Worcestershire sauce, etc. I am also still pretty wary about the "health benefits" of coconut products, so the only form of coconut usually in my pantry is the flaked kind for some Christmas cookie recipes.

Even without all those specialty ingredients, however, this is a cake I can make for my vegan friends without problems. Even better, it's one of the easiest recipes you'll find. Prep time is less than 10 minutes, and this is wonderful served warm straight from the pan, so you can whip it up when unexpected guests pop in too.

It's rich enough to not need any frosting at all. If you're not a vegan, you can sprinkle some regular chocolate chips over the top or serve it warm with some non-vegan ice cream. Or just make it plain and simple; it's that good.

Oh yes, it's also a perfect choice for introducing kids to baking, since there are no raw eggs to worry about if they end up licking--and licking and licking--the uncooked batter.

 Chocolate Applesauce Cake

1 1/2 cup sugar
1/2 cup cocoa
2 cups unsweetened applesauce
3/4 cup canola oil
1 teaspoon vanilla
2 cups flour
2 teaspoons baking soda
1/2 teaspoon salt

1.  Beat together the sugar, cocoa, applesauce, oil, and vanilla.

2.  In another bowl, stir the flour, baking soda, and salt together to be sure they are mixed well. Pour this mixture into the applesauce mixture and stir well to be sure all ingredients are combined.*


3.   Pour into a well-greased 9 X 13 pan or 10 inch tube pan. Bake at 350 degrees (325 if using a lightweight, disposable aluminum pan) for about 35 to 45 minutes, until a toothpick inserted in the center comes out clean.

4.   If you are planning to take the cake out of the pan before serving, allow to cool for 10 to 15 minutes first. The cake is very tender and may not come out of the pan in one piece if you try to remove it too soon.

*If you have a flour sifter, just measure the flour, soda, and salt into that and sift over the applesauce mixture.


Cupcake Variation

This recipe will make about 24 cupcakes. Just top each one with an almond, half a walnut, or a sprinkle of mini chocolate chips and skip any frosting for these too.


Tuesday, October 16, 2018

(Green Tomato) Mincemeat Applesauce Cake


Now that killing frosts have finished off our northern gardens for another year, some of us have access to a lot of green tomatoes. Perhaps my southern friends think immediately of frying ups these end of the season beauties, but, for me, green tomatoes in the fall mean just one thing: green tomato mincemeat. 

I know that many people have never tried mincemeat pie or have and decided it wasn't for them. However for those of us who do like this fruity, spicy mixture (that is almost always in this day and age totally without meat), there are few better choices to end a festive holiday meal.  Buying mincemeat in the store, however, is rarely a frugal choice, but an old, old family recipe that uses green tomatoes can cut the cost dramatically. If you'd like to try making your own, I posted it several years ago here:

https://frugalfastfun.blogspot.com/2012/10/green-tomato-mincemeat.html

The great thing about that recipe is that you can make a big batch and freeze it for a full season of pies.

Or cake.

With the last of last year's mincemeat still in the freezer a few weeks ago, I started looking for a way to use it without having to mix up any piecrust. I also had a few jars left from last year's applesauce canning, so finding a cake that could be adapted to include both applesauce and mincemeat seemed like it was worth a try. 

The result of my experimentation was a super moist cake that was very, very easy. Stir most of the dry ingredients together in one bowl. Mix the rest in another bowl.


Then combine the two together, stir just enough to blend and pour into the prepared pan.


No mixer to clean up, no time-consuming beating. The hardest part is waiting for the cake to bake and cook enough to get it out of the pan.

If you don't have green tomato mincemeat, this one might even be worth the splurge of picking up a jar of mincemeat just to make the cake. The fragrance in your kitchen while the cake bakes is by itself well worth the cost.

One other thing: If you really, really want to have frosting on your cake, make a thin powdered sugar glaze using orange juice for the liquid. Spread it over the top of the cake, allowing the excess to dribble down the sides. 

However. 

You definitely should try the sauce. It's easy to make and the flavors are just right with this cake--or for just about any other spice cake. You could even put a little warmed mincemeat over ice cream and top with a drizzle of the sauce and some chopped walnuts for a different mincemeat dessert.


Mincemeat Applesauce Cake
2 cups all-purpose flour
1 teaspoon baking powder
1/2 teaspoon ground cinnamon
1/2 teaspoon baking soda

2 large eggs, beaten
1/2 cup packed brown sugar
1 cup green tomato (or prepared) mincemeat
2/3 cup applesauce
3 tablespoons butter, melted
2/3 cup walnuts


Citrus Sauce
1/2 cup sugar
4-1/2 teaspoons cornstarch
1/2 cup water
2 tablespoons butter
1/2 c orange juice
1-1/2 teaspoons grated lemon zest (optional)
1/4 teaspoon lemon extract


Directions
 
1.  In a large bowl, combine the flour, baking powder, baking soda, and cinnamon. In another bowl, beat together the eggs, mincemeat, applesauce, brown sugar, and butter; stir into dry ingredients just until moistened. Don’t beat! Fold in the walnuts.
2.  Pour into a well-greased 9-in. tube pan. Bake at 350° for 35-40 minutes or until a toothpick inserted in the center comes out clean. Cool for 10 minutes; remove from pan to a wire rack to cool until just warm. Don’t try to take out of the pan too early, as it will be tender and may not come out whole.


3.  For sauce, combine sugar and cornstarch in a large microwave-safe bowl. Stir in the water until smooth. Cook in microwave about 2 to 3 minutes at medium power level until it bubbles and thickens.. Remove from the microwave and stir in butter until melted. Add juice, lemon zest and extract. Serve warm with the cake.


Monday, October 1, 2018


Sometimes, a slight adaptation of a recipe yields an entirely new end product. 

Today, I wanted to use the now abundant apples and raspberries for a cake, but I also didn't have a lot of time so would probably do better with cupcakes. I didn't have exactly what I was looking for in my files, and there was nothing on the internet that looked like what I had in mind, so I came back to my blog. 

A search for "apple cake" resulted in a lot of choices, but no apple raspberry cake. 

What I did find was an old favorite, Chocolate Apple Cake. It didn't take much to adapt that one to what I had in mind. Here they are, some sweet little bites that don't need a bit of frosting to make them a delight--though without any topping, they really do look like muffins. 


Once you bite into them, however, you'll find the very tender cake texture that tells you these are more. So, just a simple powdered sugar icing, and the result was exactly what I had hoped for--cupcakes!


Apple Raspberry Cupcakes

2 c flour
1 1/2 c sugar
1 t soda
1 t cinnamon
1/4 t nutmeg
1/4 t allspice
1/2 t ginger
3/4 c canola oil
3 eggs
2 c apples, cored but not peeled and finely diced--pack lightly into the measuring cup for measuring
1 c raspberries--if using frozen, do not thaw
1/2 c chopped walnuts (optional)

1.  Sift the dry ingredients together into a large mixing bowl.

2.  Stir in the oil, eggs, and 1 cup of the apples. Begin beating with a mixer until mostly blended.

3.  Gradually stir in the remaining apples and raspberries and beat at medium speed for about 3 minutes. The batter will be very thick, so it will be best to use a mixer for this rather than trying to beat by hand.

4.  Fold in the walnuts if using.


5.  Line muffin pans with cupcake liners and spoon the batter evenly into each one. Fill each liner about 3/4 full.  This recipe makes about 24 to 28 cupcakes.

If you don't have enough muffin pans to bake all at once, it will be all right to leave the remaining batter standing at room temperature while the first pan bakes.

6.  Bake at 350 degrees for about 15 to 20 minutes, until the center of a cupcake springs back when lightly touched. Frost as desired when cool.


And a digression:

A Microwaved Mini-Cake

I was in a hurry to get these finished and ended up with more batter than my two pans would hold. As noted in the recipe comments, it doesn't hurt the batter to sit out and wait while the first cupcakes are baking, but I was, as I said, in a hurry.

So what does every impatient cook/baker have in her kitchen? 

A microwave.

Many years ago when I got my first microwave, it came with a hardbound, more than 100 pages, cookbook, and that quickly became a reference for me. I was living in Arizona, in a poorly insulated house, so my kids will tell you that I had "rules" about not using the conventional oven through most of the summer--and spring and fall when the heat remained more oppressive than in other parts of the country ever experience.

In that cookbook were several recipes for cakes and muffins, even cornbread, and I tried many of them, and I discovered that these things could be made in the microwave. Yes, there was no golden brown color or light crust on the top, but that just meant that you focused on chocolate or spice cake recipes. Cupcakes and muffins were easier to get right than a full cake--and nothing bigger than a 9 inch round or square pan was recommended. I soon found a microwavable cupcake pan that helped on this score.

So yes, I occasionally made these desserts in the microwave. After leaving that overly warm kitchen, however, I rarely try baked goods in the microwave, even on the hottest summer days when I still avoid using my oven. My impatience today, however, brought that possibility back to mind. I pulled out an oven-safe bowl (the 1 quart size), poured inthe remaining batter, and tucked it into the microwave.  About 5 minutes, at medium power (level 5 on my particular model) and a quick check with a toothpick to be sure it was done in the middle. 

Be careful not to overbake; you can't rely on browning to know if it is done.


Voila--a mini-cake! Note that the color is pretty insipid, especially compared to those lovely golden cupcakes in the background. However, a little basic powdered sugar icing and...


A small cake, just right for two, maybe three, people for a special kind of dessert.

Banana Bread with Grapenuts


Lots of bananas that suddenly turned very ripe in the late, unexpected, September heat. A big box of Grape-Nuts still to be used. Walnuts at a better price than they have been for years.

Time for Banana Grape-Nuts bread.

This is a recipe I started making years ago, with just a few tweaks here and there. Adding the lemon juice to the bananas as they are mashed keeps them from browning quite as much and counters, just a little, the overall sweetness of the bread.

Back when I rarely had whole wheat flour on hand, the addition of Grape-Nuts provided just a little more body and texture than more standard recipes. The nice thing about this cereal is that it is still one of the few that does not have added sugar.

As with most of these kinds of bread, it slices much better on the second day, an advantage if you are making it for a brunch or coffee and have lots of other last minute kitchen work to do.

Finally--it is wonderful without any kind of spread--though a little cream cheese or butter on each slice is certainly acceptable!

While the original recipe suggested using one large loaf pan, I have always had better results by making this in smaller pans--a little more of the caramel-y crust and less likelihood that the outside will dry out before the center is completely baked. It also works nicely in small 3 X 6 pans for Christmas or other gift giving occasions.


Banana Grapenuts Bread

1 c mashed ripe banana
1 1/2 t lemon juice
1 1/2 c Grape-Nuts cereal (generic brands work just as well too)
3/4 c sugar
1/4 c canola oil
2 eggs
1/3 c dry milk powder (see NOTE)
2/3 c water (see NOTE)
1 3/4 c unbleached flour
2 1/2 t baking powder
2 t cinnamon
3/4 c coarsely chopped walnuts

1.  Mash the bananas and stir in the lemon juice.

2.  Beat the bananas, Grape-Nuts, sugar, oil, eggs, milk (dry milk and water) together and allow to sit for at least 20 minutes.

3.  Sift together and gently fold in the flour, baking powder, and cinnamon, mixing only enough to incorporate all the flour mixture.

4.  Fold in the nuts and turn the batter into two well oiled 8 1/2" X 4 1/2" pans (OR one 9 X 5 and one 8 1/2 X 4 1/2, if those are the only ones you have--like me!)  


5.  Bake at 350 degrees for 40 to 45 minutes,  until toothpick inserted into center comes out clean. Cool 5 minutes; remove from pan. Cool completely on wire rack.

 NOTE:  This can be made with 2/3 cup milk or plain yogurt instead of the dry milk and water.


About the nuts:

I have written before about the moljahete that I have been blessed with--if you haven't heard the term, this is a large mortar and pestle made out of rock that makes wonderful guacamole. However, I have learned that, because I don't use mine for a very garlicky salsa, it also provides a very quick way to coarsely chop walnuts...as you can see here:


And one more thing, another OOOOPS moment:

I had taken the photos of the walnuts being crushed in the moljahete and the batter in the pans, so into the oven went the two loaves. As I began to clear away the bowl, spatulas, etc., I realized there were two eggs laying on the counter. 

Two eggs that were supposed to have been in the batter. I quickly pulled the pans out of the oven, thankfully before they had really started to heat up, and turned the batter back into the bowl. Remember the instructions to "gently" fold in the flour? These breads come out best when the batter is handled lightly, but now I had no choice. There was going to have to be more mixing in order to get those eggs fully incorporated.


All turned out well, as I should have expected. While the preferred method is still the one listed in the recipe above, most things we make are more forgiving than we sometimes think. In this instance, it was impossible to tell that there had been an added step in the making of the bread!

Friday, September 21, 2018

Applesauce Oatmeal Cake with Orange Glaze


.

This is an old-fashioned cake that is just right for a chilly autumn evening or weekend dessert. It goes together pretty quickly, all in one saucepan, and the fragrance it will bring to your house--amazing!

As I've noted before, I like to keep orange juice concentrate in the freezer for recipes like this. The contrast of the orange glaze and the apple-y, cranberry filled cake gives a great depth to this really pretty simple dessert.

Applesauce Oatmeal Cake with Orange Glaze 

1 1/4 c unsweetened applesauce
3/4 c old fashioned or quick oatmeal
1/2 c dried cranberries
1/2 c butter
3/4 c brown sugar 
1 t vanilla
1 egg
1 1/2 c flour
1 t baking soda
1 t cinnamon
1/2 t nutmeg

Glaze
2 T melted butter
2 T orange juice concentrate, thawed slightly
enough powdered sugar to make a very thin glaze--about 1 1/2 c at most

walnuts--about 3/4 to 1 cup, coarsely chopped or broken

1.  Pour the applesauce into a pan large enough to hold 5 to 6 cups of batter- quart and a half saucepan will be a good size. Heat the applesauce to just below boiling on medium high heat, stirring to be sure it does not stick on.  


2.  Stir in the oatmeal and dried cranberries and let the mixture cool, about 10 to 15 minutes. 

3.  Stir the butter, brown sugar, vanilla, and egg into the applesauce mixture. Sift the dry ingredients together and gently stir into the batter. Stir just until thoroughly mixed. 

4.  Pour into a 7 X 11  pan  that has been well-oiled or sprayed with cooking spray. Immediately put into oven and bake at 350 degrees for 25 to 30 minutes.

5.  While the cake is baking, mix the butter, orange juice concentrate, and powdered sugar. (Note that I just lightly rinsed the saucepan used for the cake batter; this is truly an easy clean up cake, with one pan for each step!)

   
As soon as the cake is done, remove it from the oven and spread the glaze evenly over the top, poking it in lightly with a cake. 

Sprinkle the walnuts evenly over the top. Serve warm or cold.


Microwave version:

Put the applesauce in a 2 quart mixing bowl in the microwave. Cover loosely (to avoid spatters) and heat until just below boiling, about 2 to 3 1/2 minutes. Proceed with the recipe as above.
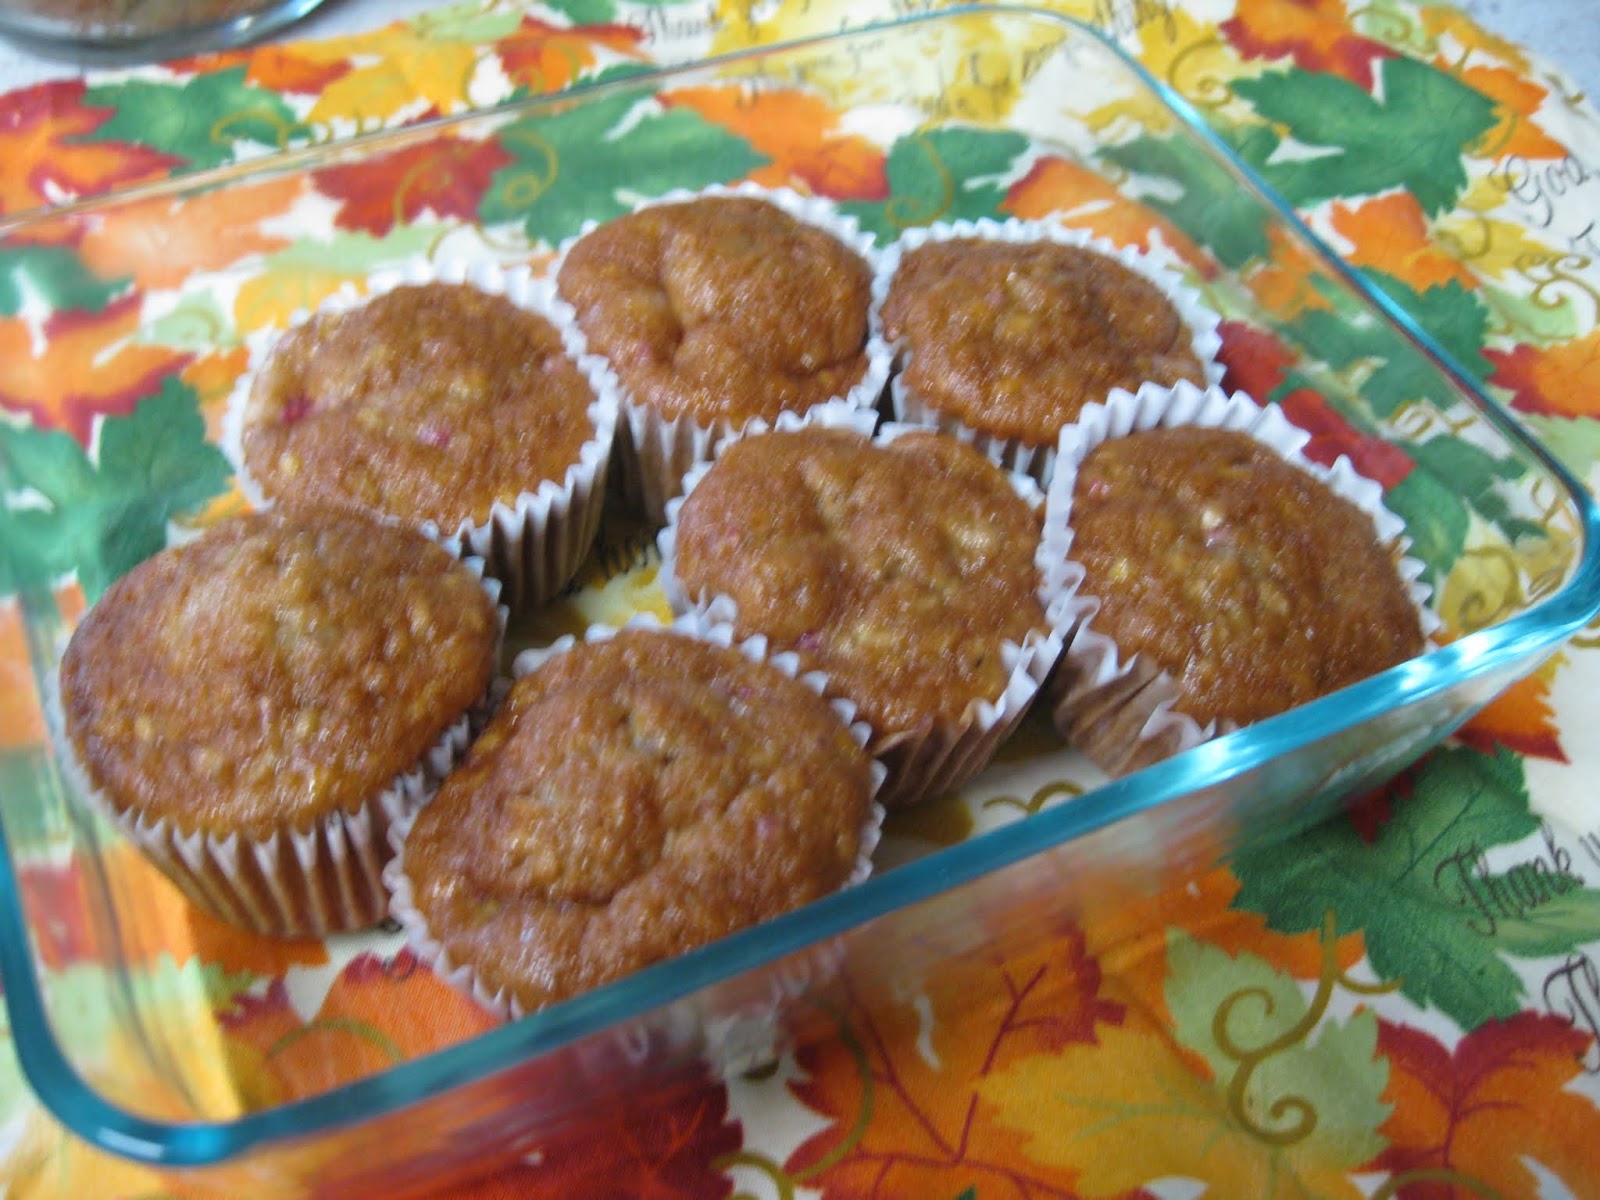
A Larger Cake:

This recipe is easily doubled (just be sure to use a large enough pan!), using a 10 1/2 X 14 1/2 pan--or a 9 X 13 pan and about 6 to 8 cupcakes too. 

Addendum:

  I've been going through some of the oldest posts on this blog (has it really been ten years!), and I found an entry from 2011 that I had never published. It was for this same cake but had a different set of comments. Since it includes a favorite photo along with a little more background to the recipe, here is part of that earlier draft, from January 2011. The boys are just a bit bigger these days!


A few weeks ago, two of my grandchildren were here on a Saturday, so we made applesauce together. There is nothing like an old-fashioned food mill to get kids interested in working in the kitchen! The results were wonderful as usual, as homemade applesauce beats the purchased kind any time. Even so, there was still a good bit of applesauce to be used up when it came my turn to make some desserts for a morning coffee and Bible study. I went looking on-line for recipe ideas, but everything seemed to use only half a cup or so, and I really wanted to use up quite a bit more. So I went to a source that I use less and less, my three drawer recipe card file.

After I went away to college, I never lived near my parents again, so we spent a lot of vacations at their home, and they in turn visited often, no matter how far across the country we were. My Mom and I seemed to spend at least some part of each of these visits rummaging through both of our recipe files and cookbooks, copying especially good sounding recipes for later use. I guess it was natural then that I would be the one who inherited my Mom's own overflowing recipe files. While I continue to whittle down my cookbook collection, these painstakingly hand-written and typed cards continue to hold their place of honor in my kitchen.

On that snowy afternoon last week, I pulled out the Cake section of Mom's cards and rifled through the stack, remembering our conversations and her comments about some of the cards that she had inherited from her mother and grandmother. There were the cards in Grandma K's backward slanting penmanship and a card or two with ingredients listed as a lump of butter and a teacup of milk, from my other Grandma and even Great-Grandma Mereness.

But it was the card for an Applesauce Oatmeal Cake that seemed to be just what I was looking for. Mom had typed it as she did with so many recipes, a feat I never could match. (For those of you too young to remember typewriters, getting a 3 X 5 card fed into the platen without being crooked and then typing it all the way down without going off any of the edges--that was truly a skill!)

Perhaps the most interesting thing on the card was the source. Mom always was careful to indicate where she had gotten a recipe, and this one listed me as the person from whom the recipe came, along with a 1976 date. Hmmm. I really did not remember the cake at all, so I went back to my own file of cake recipes. There, deep in the pack of little used cards, I found a clipping from The Sheboygan Press with no date and no comments about when I might have made it. (That was something else Mom did that I have learned to do--make a note next to any recipe I use, with the date of preparation and a comment as to how well it worked, how well it was received, etc.) The recipe was an exact match for the one in Mom's recipes, so it had to be the source.

Now I was intrigued and definitely had to try it. I'm glad I did; this is a cake that is quick to make, not too sweet, and moist enough to last for a few days if it doesn't get eaten right away. I made it twice (the second time doubling the recipe) and served it to several different groups of people, all of whom were quick to have seconds.